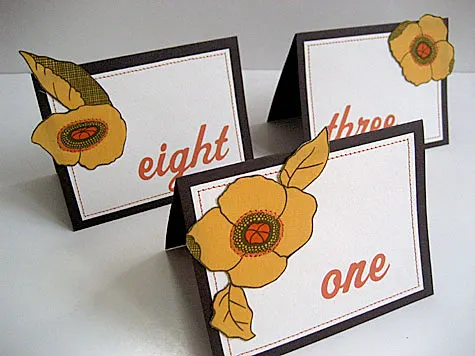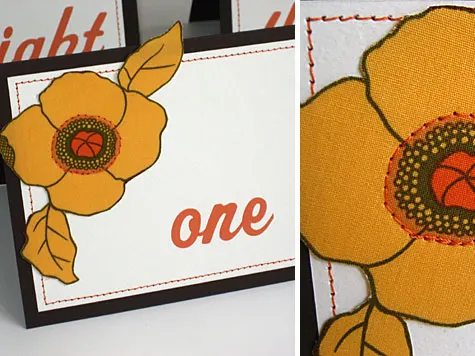
If you’re like me table numbers are probably one of the last details that you’re thinking about. But they can be a key way to dress up and personalize your tables. I sewed the table numbers for our wedding in the same style as our guest place cards – brown and cream paper with orange numbers and cut-out fabric poppies sewn freeform with orange thread.
Supplies:
- 8 1/2 x 11 cream heavyweight text paper
- Brown foldover cards
- Orange thread
- Fabric
- Fusible interfacing (craft weight, medium or heavy)
- Rubber cement or glue stick
- Craft weight interfacing
Using Illustrator or even Word lay out your numbers. Print numbers onto the cream paper; I just used my ink jet printer. Cut out the cream rectangles using a paper cutter or a box cutter and ruler. Rubber cement them lightly onto the brown foldover cards, let dry, and sew using orange thread and a straight stitch or any decorative stitch you choose.
Iron interfacing onto your fabric; interfacing makes sure your fabric cutouts stay crisp on the table numbers. Then cut out fabric shapes or cut out objects like the flowers and leaves I did; sew them onto the card. Don’t worry about securing them down on all sides; it actually looks better and more organic if you leave the edges loose.

Now they’re ready to put on your tables! Shane and I chose eight-foot long rectangular tables in a linear setup to add to our wedding’s intimate communal feel. Tables draped in chocolate brown linens were decorated with bittersweet, mini-gourds and votive candles with printed menus tucked inside golden yellow napkins.
Like this theme? Then try our sewn poppy fabric invitations, sewn return address envelopes with custom stamps, guest towels, ring bearer pillow, place cards, sewn zigzagged programs, menu, reserved signs, whimsical flower garland “altar” and bridesmaid’s handbags.
Don’t feel like making them yourself? Contact me and I’ll help.
COPYRIGHT NOTE: You’re more than welcome to use this project and pattern for your own personal use. Please post a comment below or email me if you use this project so I can smile when I see that it’s being used. Craft and pass it on!

Rebecca
Friday 5th of March 2010
cute!
Amanda
Thursday 29th of October 2009
These are great! They were pretty easy to make since I had almost everything I needed already. I turned them into thanksgiving place cards and used extra fabric for a table runner.