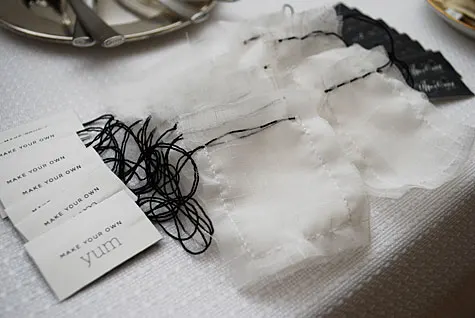
I’m posting the free tutorial for how to make sewn fabric teabags for loose tea by request. Jessica Mullen wrote: “I saw your beautiful photos from the tea party and I have a quick question. I was wondering how you made the tea bags for the make your own tea take home favors. I would love to do this for a baby shower I am throwing in 2 weeks. Any other ideas to make a baby shower more special using the tea theme? I love your ideas!!”
Thanks, Jessica! Here’s how to make sewn fabric teabags for loose tea. My friend Heather came up with this idea for our Upper Crust Social Club Ladies’ Late-Night Tea Party and I liked it so much that I decided to make a gold sewn tea bags variation for my mom as a DIY gift. So we’ve provided two free templates below, or you can easily make your own custom labels for your own teabags.
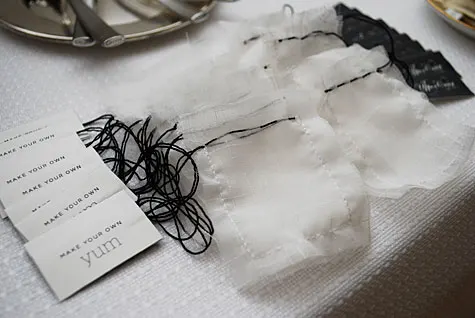
Supplies for handsewn fabric teabags:
- Heather’s free how to make your own teabags template and matching tea tents for display (PDFs – ready to print as is) or Kathy’s free how to make your own teabags template (Adobe Illustrator format, just download a trial version of Illustrator and change the names to customize) …or, create your own tags using Adobe Illustrator or Microsoft PowerPoint
- Sheer fabric to make tea bags (we used remnants from my living room curtains that has a nubby texture)
- White thread
(or gold thread)
- Thick black craft thread
(or gold thread)
- Straight pins
- Craft glue
(Aleene’s, Elmer’s, etc.)
- Thick white paper (I like luxe cream cover weight paper)
- Hand sewing needle
- Self-healing mat
, rotary cutter
and clear plastic ruler
OR good fabric scissors
Supplies for packaging:
- White paper bags with a handle
- Clear plastic treat bags
- Pretty stickers
OR 8 1/2″ x 11″ sheets of sticker paper (ink jet)
or buy laser sticker paper from an office supply store to make your own custom stickers on the computer like we did
- Chinese noodle take-out boxes (optional)
:: For Making Your Own Tea Bags ::
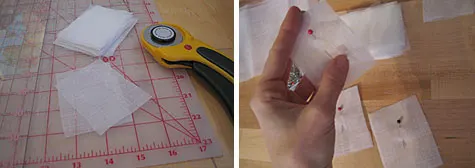
First, cut your sheer fabric into 3″ x 2.5″ rectangles using your self-healing mat, rotary cutter
and clear plastic ruler
OR good fabric scissors. Pin the rectangles together in pairs.
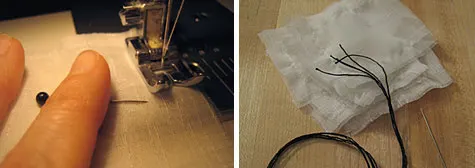
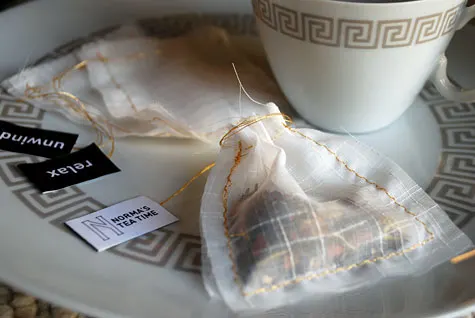
Machine sew around three sides of the teabag using white thread, leaving about 1/4 inch on the sides. I love the raw edges of the teabag, so embrace any fraying.
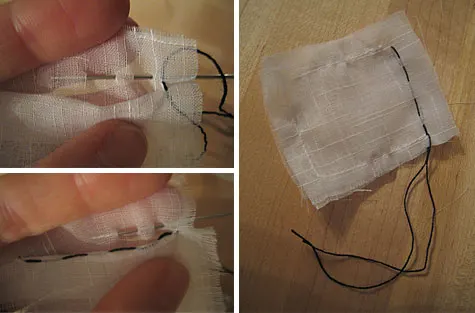
Thread your handsewing needle with thick, black thread, or use colored embroidery floss. Weave your needle in and out of the front side of the teabag and then around the back side of the teabag, leaving long extra thread pieces on both front and back. Be sure to avoid sewing the top of the tea bag shut. No need to tie any knots on this step.
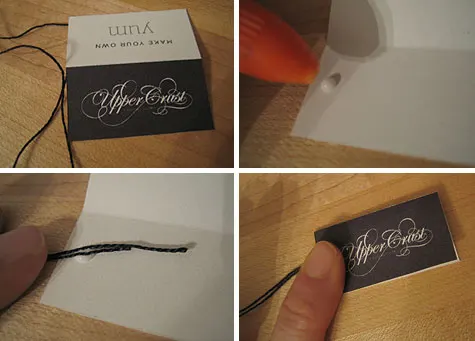
Print and cut out your tea labels using one of the two free templates provided, or making your own in Adobe Illustrator or PowerPoint. Fold them in half and place a dot of Elmer’s glue on one end …a little goes a long way. Place the teabag string ends on the glue and close to seal.
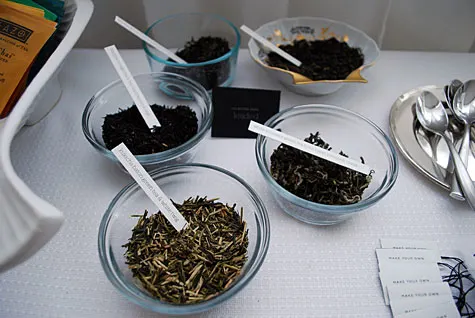
Create a “loose tea bar” using clear cups and other assorted small bowls. Fill your teabag with loose teas (my favorites including Blood Orange Tea are from Adagio Teas …check them out. You can get free shipping with a $50 purchase
).
:: For packaging ::
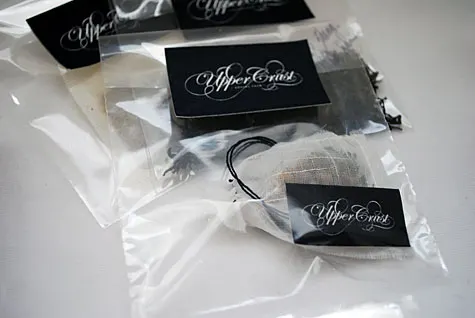
Buy clear plastic treat bags to put in a tea bag. Seal using pretty stickers, or make your own custom stickers like we did by buying 8 1/2″ x 11″ white printer sticker sheets and creating your own label in Adobe Illustrator or Powerpoint.
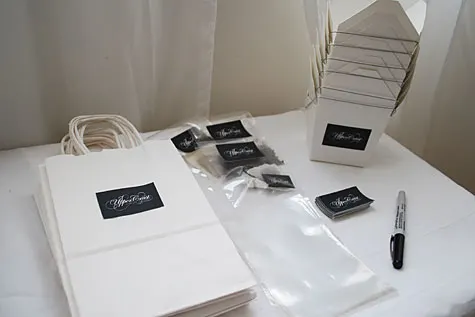
Provide white paper bags with a handle and Chinese noodle take-out boxes for people to carry their goodies home. Relax and unwind!
COPYRIGHT NOTE: You’re more than welcome to use free pattern and how t0 step-by-step tutorial for your own personal use. Contact me for any commercial use – this includes etsy sellers.
Please post a comment if you use this project and let me know how it works for you. And you can post your photos to our “I made it!” flickr photo group. Craft and pass it on!

Darlene Donnelly
Thursday 9th of October 2014
We are hosting a baby shower and loved this idea for our tea party theme. However we didn't like the idea of loose threads floating in our tea. I made the bags 3 1/2 X 2 1/2 and turned the raw edges inside. I also turned the top open edge 1/2 inch inside the bag then sewed the floss. Our 'test' tea bag worked great with no floating threads. I found some adorable baby buttons from "Dress It Up' buttons and knotted them on the floss ends instead of cardboard tags. They look so cool!!
alessandra
Saturday 19th of January 2013
Hi, I love your idea! I posted your link on my blog
http://ricominciodalte.blogspot.it/
Ciao
Siona
Saturday 21st of April 2012
You are linked in http://laboresenred.blogspot.com ¡thanks!
Love Sparkle Pretty
Sunday 20th of February 2011
Thank you so much for this great idea! I Love this!!! I have posted it on my blog with a link to your site :)
Jessica
Thursday 1st of July 2010
love this idea! Would like to blog about it sometime. Will be sure to post a link to your site. Thanks for sharing!