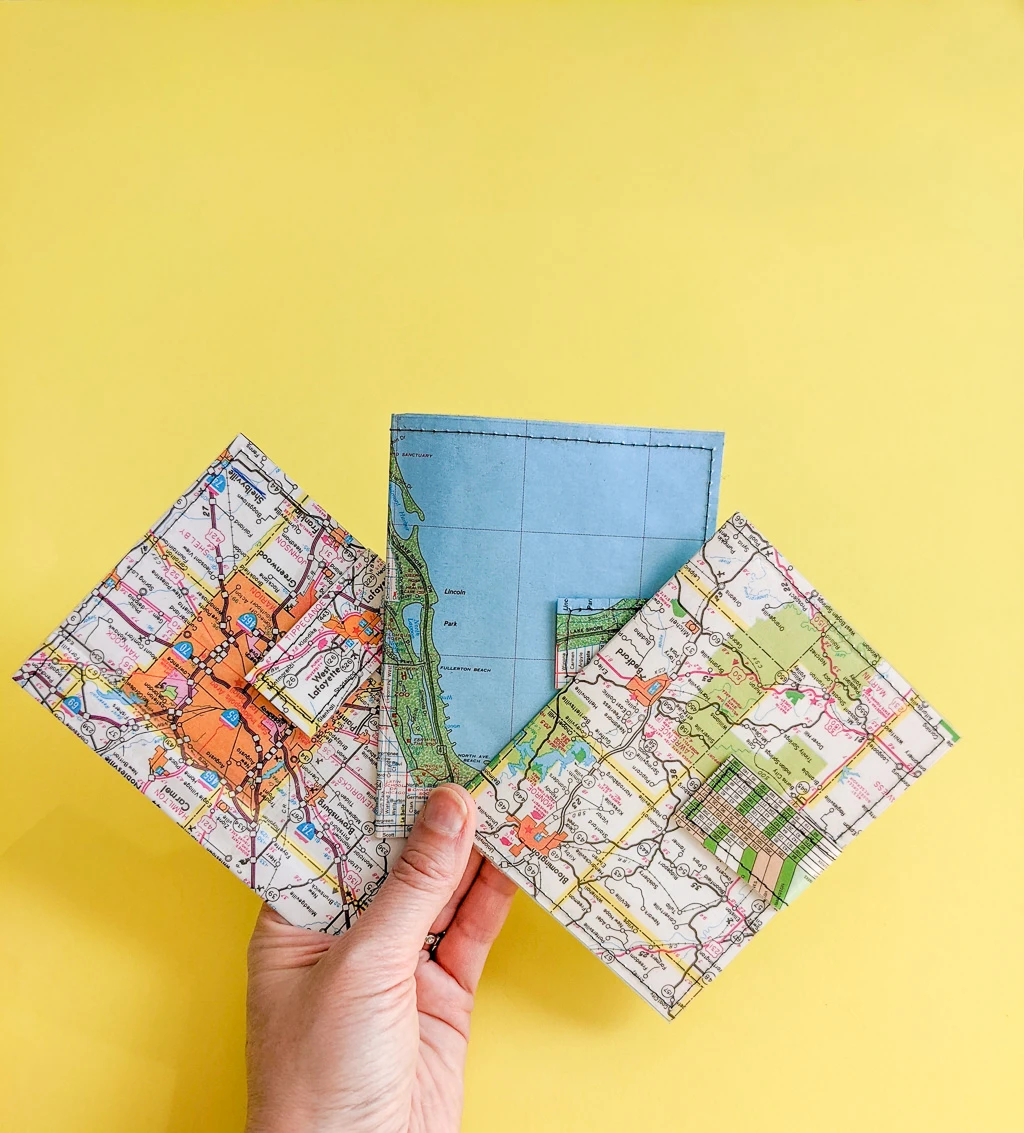
Make a cute DIY card holder from paper. Yep, paper! My card holder is covered with clear contact paper so it’s water-resistant to protect your cards. My card holder wallet sewing pattern is a great craft idea for adults. I’ve been making a whole bunch of these cute DIY card holders for my friends and family. I mean, sewing for kids is fun but it’s nice to surprise people with a useful handmade treat.
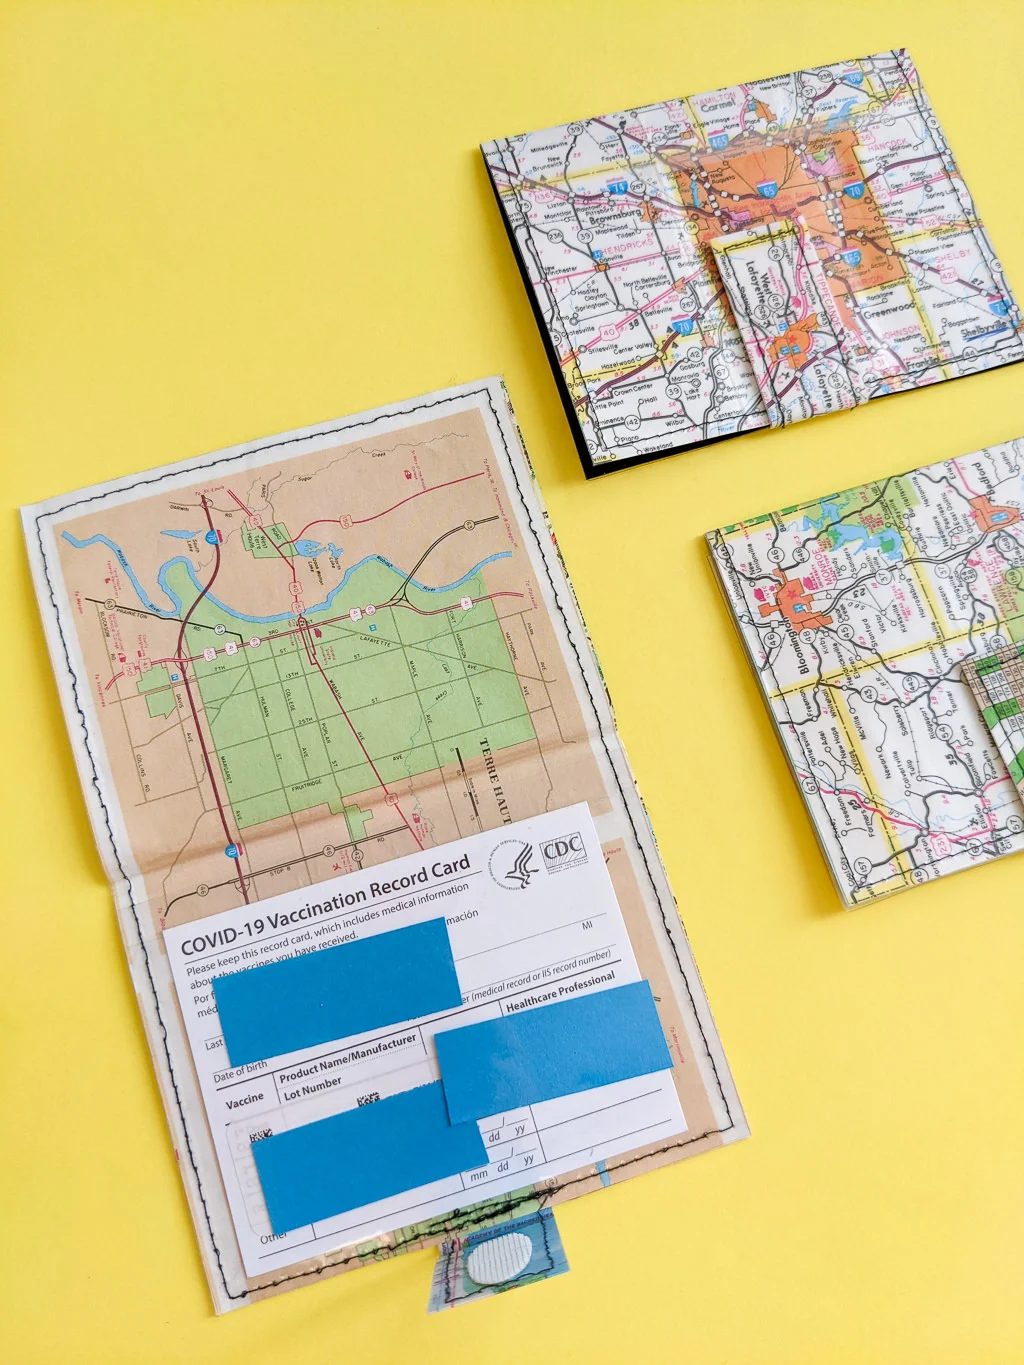
I’m using my card holder to protect my vaccination record card. You could choose to hold credit cards, reward cards, or even gift cards in your DIY card holder. And for gift card holders, it’s like the recipient will get two gifts in one!
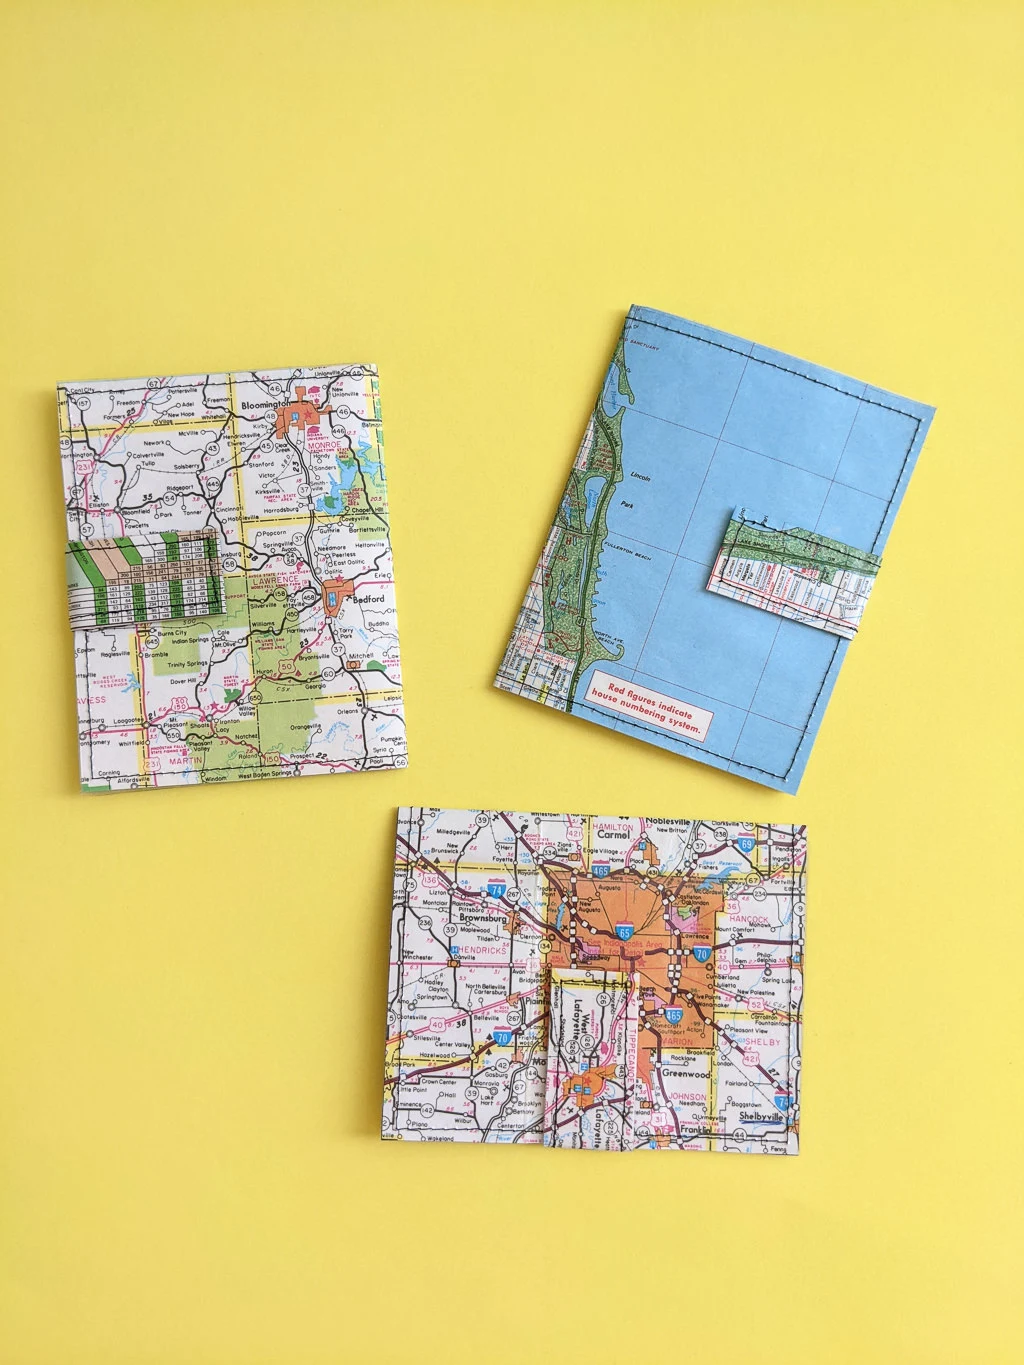
Cute paper DIY card holder wallet
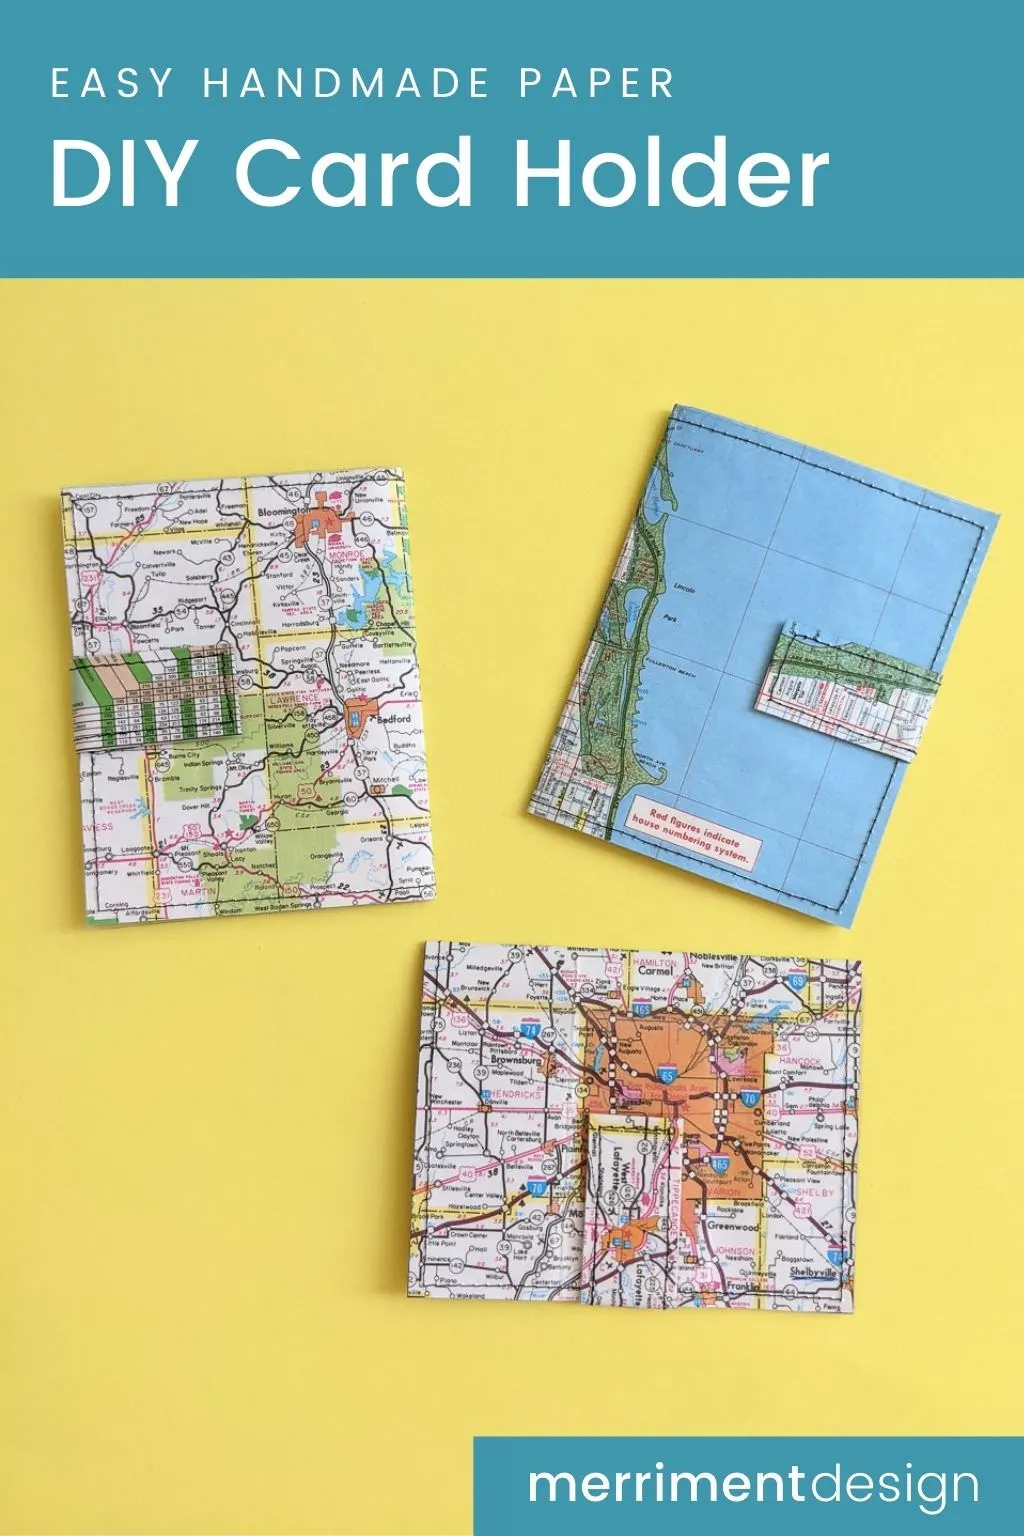
My handmade paper DIY card holder pattern is both cute and minimalist. You can choose any kind of paper to make my credit card holder wallet, either upcycled paper like old maps and books or new paper such as decorative stationery. If the paper you choose is on the thinner side, or if you want to make your cardholder water-resistant rather than waterproof, then I recommend covering the paper with clear contact paper to protect both the cardholder and its contents.
DIY vaccine record card protector
My sister Karin inspired this free sewing pattern. She texted me a picture of a vaccine holder for sale and told me that I should make some myself. So I figured out my own pattern and now you can make them, too! And if you’d rather buy a vaccine record card protector, check out the cute upcycled vaccine record card protectors at Mugwump’s Etsy shop. Mugwump makes vaccination card protectors from sturdy construction of paper, banner vinyl, clear coating, and industrial strength thread using fun reclaimed materials like Yahtzee score cards vaccine record card protectors and vaccine record card protectors from Dr. Seuss book pages.
A creative craft with old maps or books
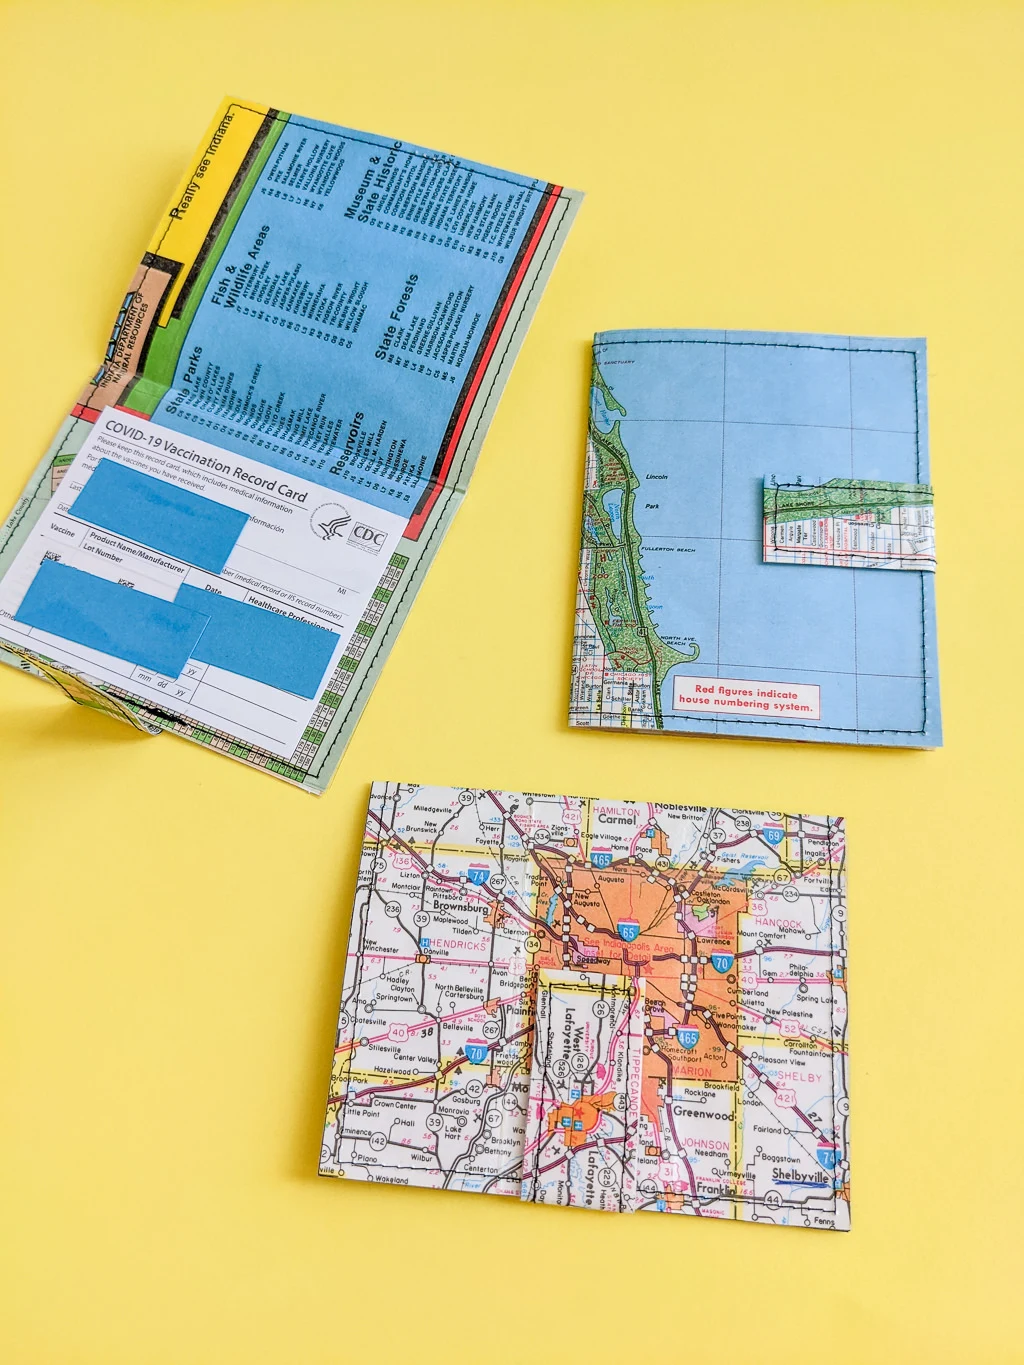
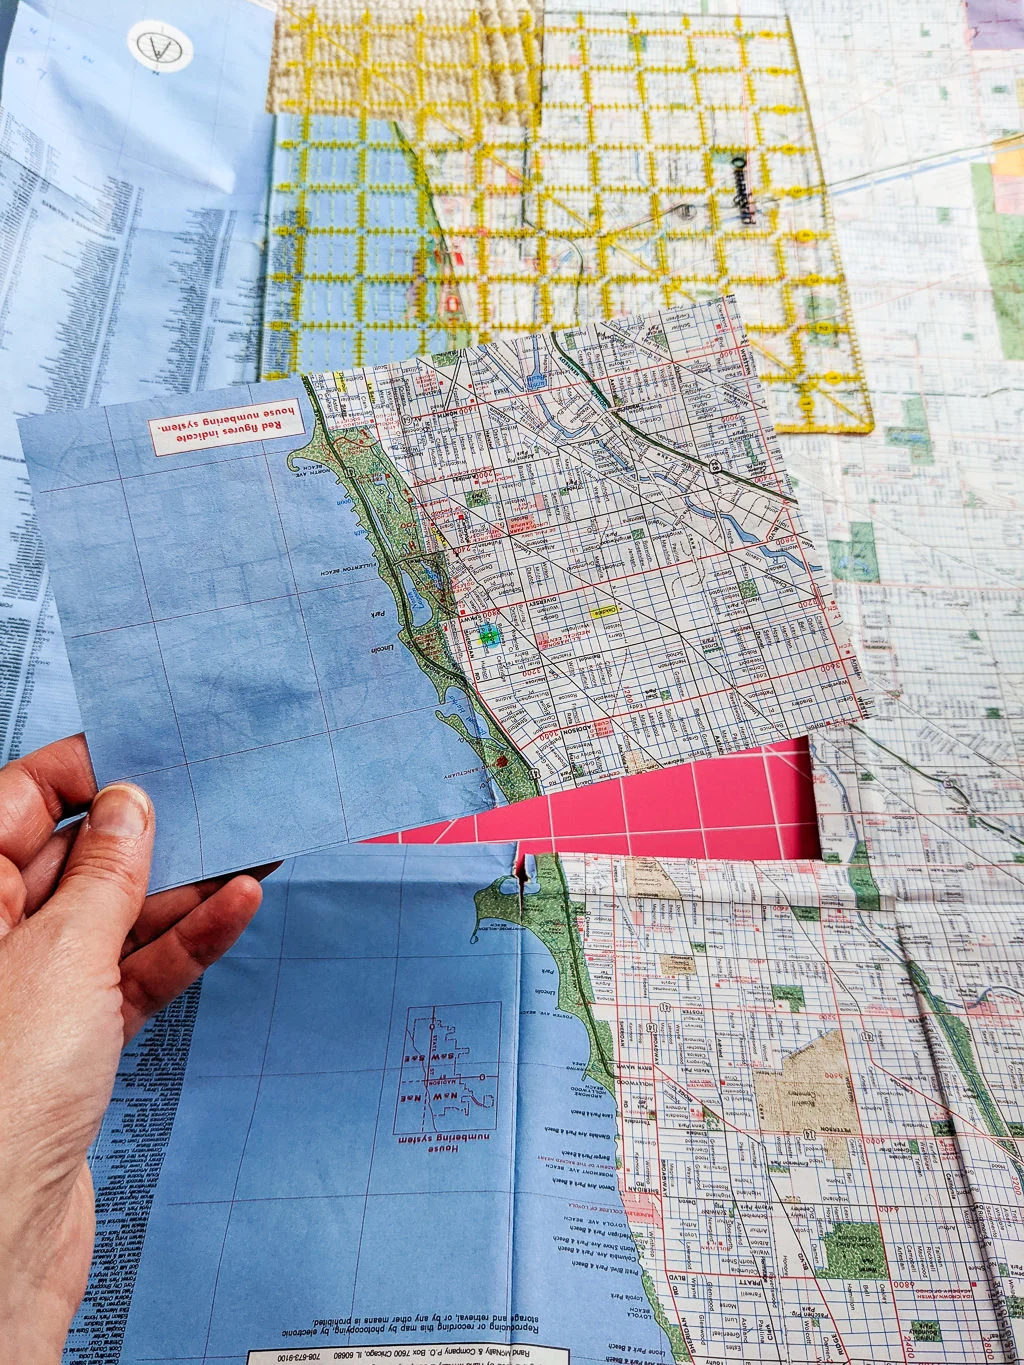
Maybe you’re thinking, what can I make with old maps? Upcycle paper maps into my cute DIY card holders! My old maps of Chicago and Indiana have been sitting in my craft closet for AGES. I mean, they’ve been on my ‘make something with this’ shelf for years and years. The Chicago map is from way back in 1993 when Nirvana was king and I was a whole lot younger and less wrinkly. And I’m pretty sure that my dad gave me the Indiana map. He highlighted roads on them to help me safely drive places on my own BGM (Before Google Maps). I had a lot of fun figuring out which part of the map to cut out to make my card holder wallets. I snipped out Lake Michigan and Lincoln Park for Krista, Indianapolis for Karin, Bloomington for Mike, Naperville for Pat, Lincoln Park for Danielle, Wilmette for Cristin, and I still have maps left over to make more.
Anyway, I love the typography and colors on these old maps. My DIY card holders definitely have that vintage map feel. I’m so glad that these old maps are finally free from my craft closet.
Keep reading to see how to sew your own card holder wallet from paper.
See also: ‘DIY passport cover free sewing pattern’ »
More easy sewing projects
If you love beginner sewing projects, try one of these patterns next:
Merriment Design is supported by readers like you. If you buy products that I recommend, I may earn an affiliate commission at no additional cost to you. Thanks – your clicks help me make more free DIYs!

Supplies for making a DIY card holder wallet for vaccine cards, credit cards:
- Kathy’s free DIY card holder pattern (PDF)
- Old maps, pages from books, or pretty paper
- Clear vinyl – either new or recycled retail packaging (such as the vinyl cover on new sheet sets and pillowcases)
- Clear contact paper
- VELCRO® Brand Thin Fasteners
- Clover Wonder Clips (optional but recommended)
- Thread
- Craft knife, metal ruler, and self-healing cutting mat
- Walking foot for your sewing machine (optional but recommended if using clear contact paper)
How to make a DIY card holder wallet using paper, old maps, or books:
Step 1: Cut out the card holder pieces
My card holder free sewing pattern makes a 5″ x 3-3/4″ sized holder and you can increase the size if you want for your credit cards, reward cards, gift cards, or vaccine record card. Use my free pattern to cut these card holder pieces from old maps, recycled books, or decorative paper and vinyl:
- 1 outside piece from paper
- 1 inside piece from paper
- Interior pocket (cut 1 or 2, your choice) from clear vinyl
- 1 closure piece from paper
Step 2: (optional) Cover paper with clear plastic to make them water-resistant
This step is optional but recommended because it protects both your card holder and its contents. Cut a piece of clear contact paper slightly larger than the outside piece of paper. Place the outside piece of paper on a self-healing cutting mat, right side up. Peel the clear contact paper from its backing and place onto paper map, smoothing out any wrinkles. You want the contact paper to stick to the cutting mat on all sides.
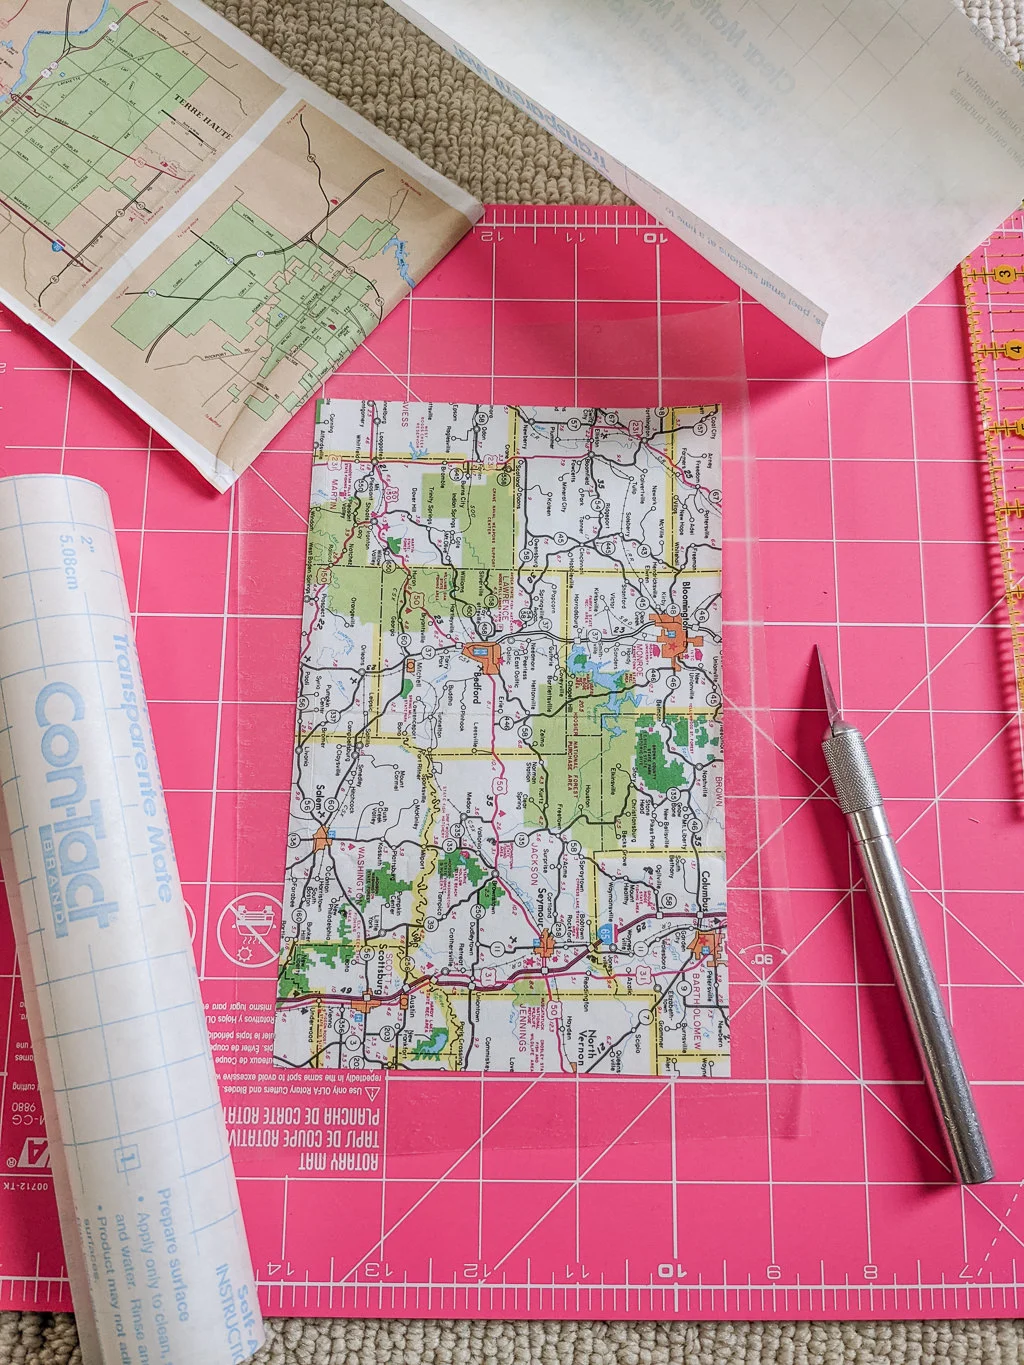
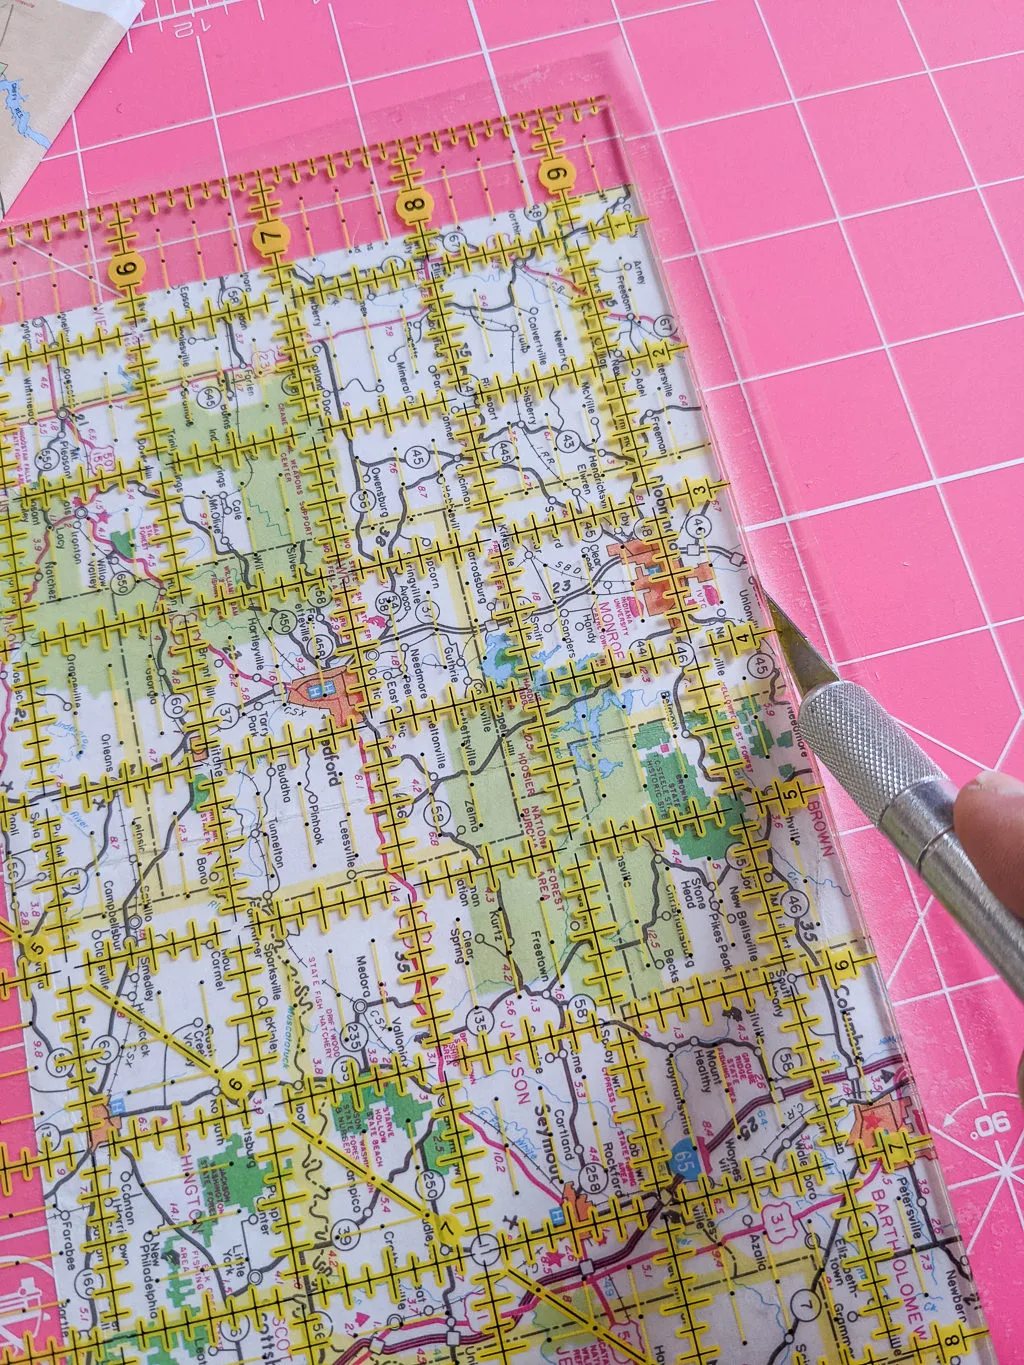
Trim the clear contact paper to fit the card holder pattern piece by running a craft knife next to a metal ruler. Or you could use scissors if you don’t have a craft knife, metal ruler, and self-healing mat. Repeat step 2 for the inside piece of the card holder.
Step 3: Assemble the card holder wallet into a stack
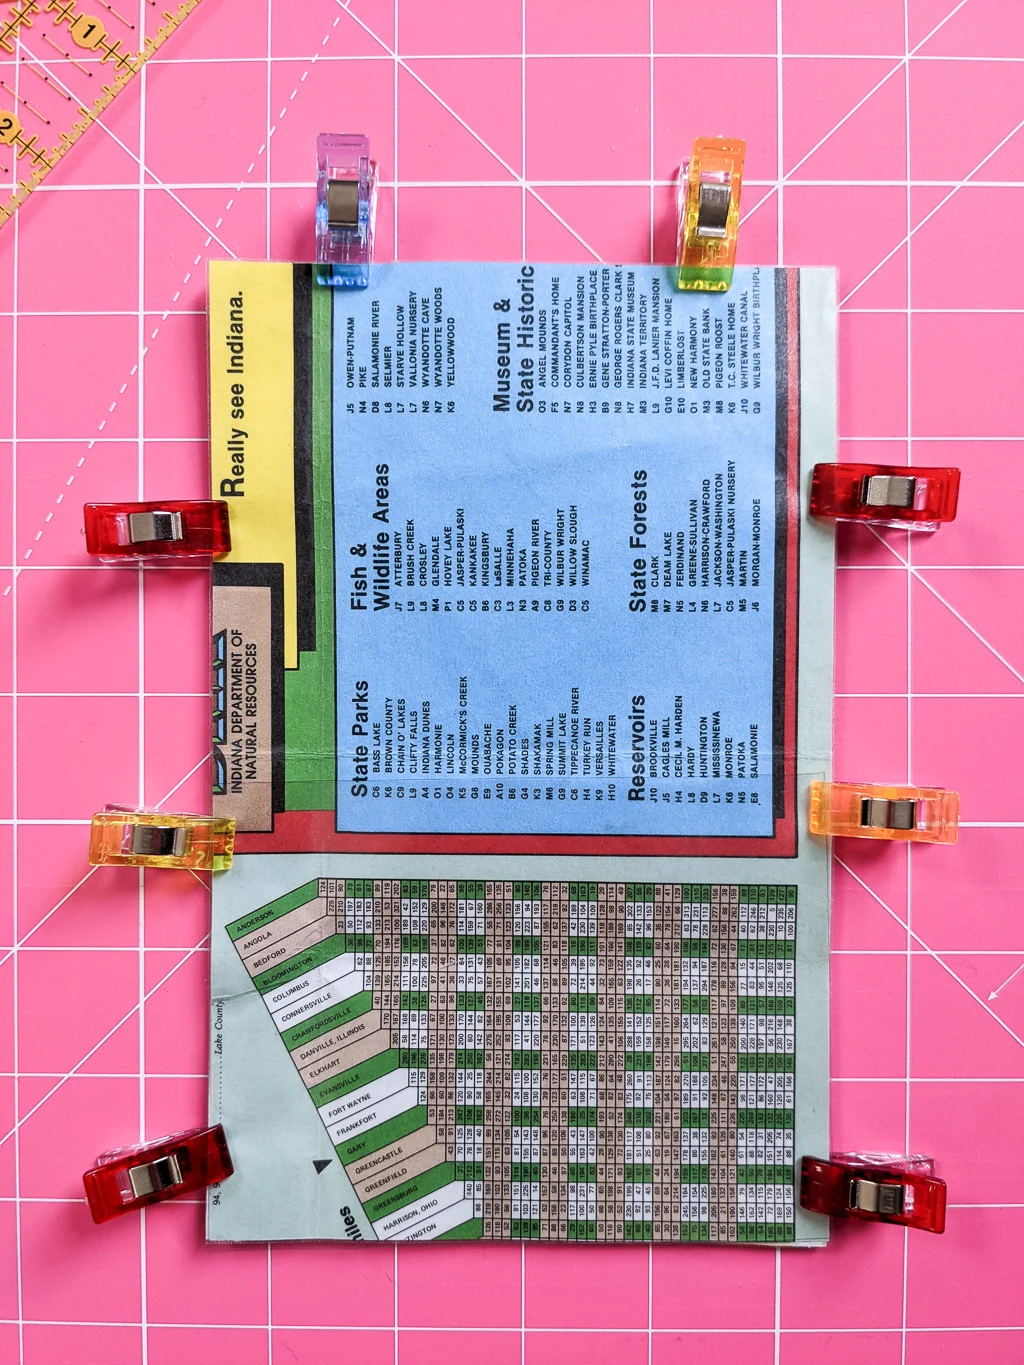
Place the outside piece right side down on the cutting mat. Add the inside piece right side up. Finally, add the clear vinyl pocket on top so that it’s flush with the bottom of the card holder. If you’re adding two clear pockets, then add your second clear vinyl pocket flush with the top of the card holder. It’s a little difficult to see the clear vinyl pocket below but it’s held together below using Clover Wonder Clips.
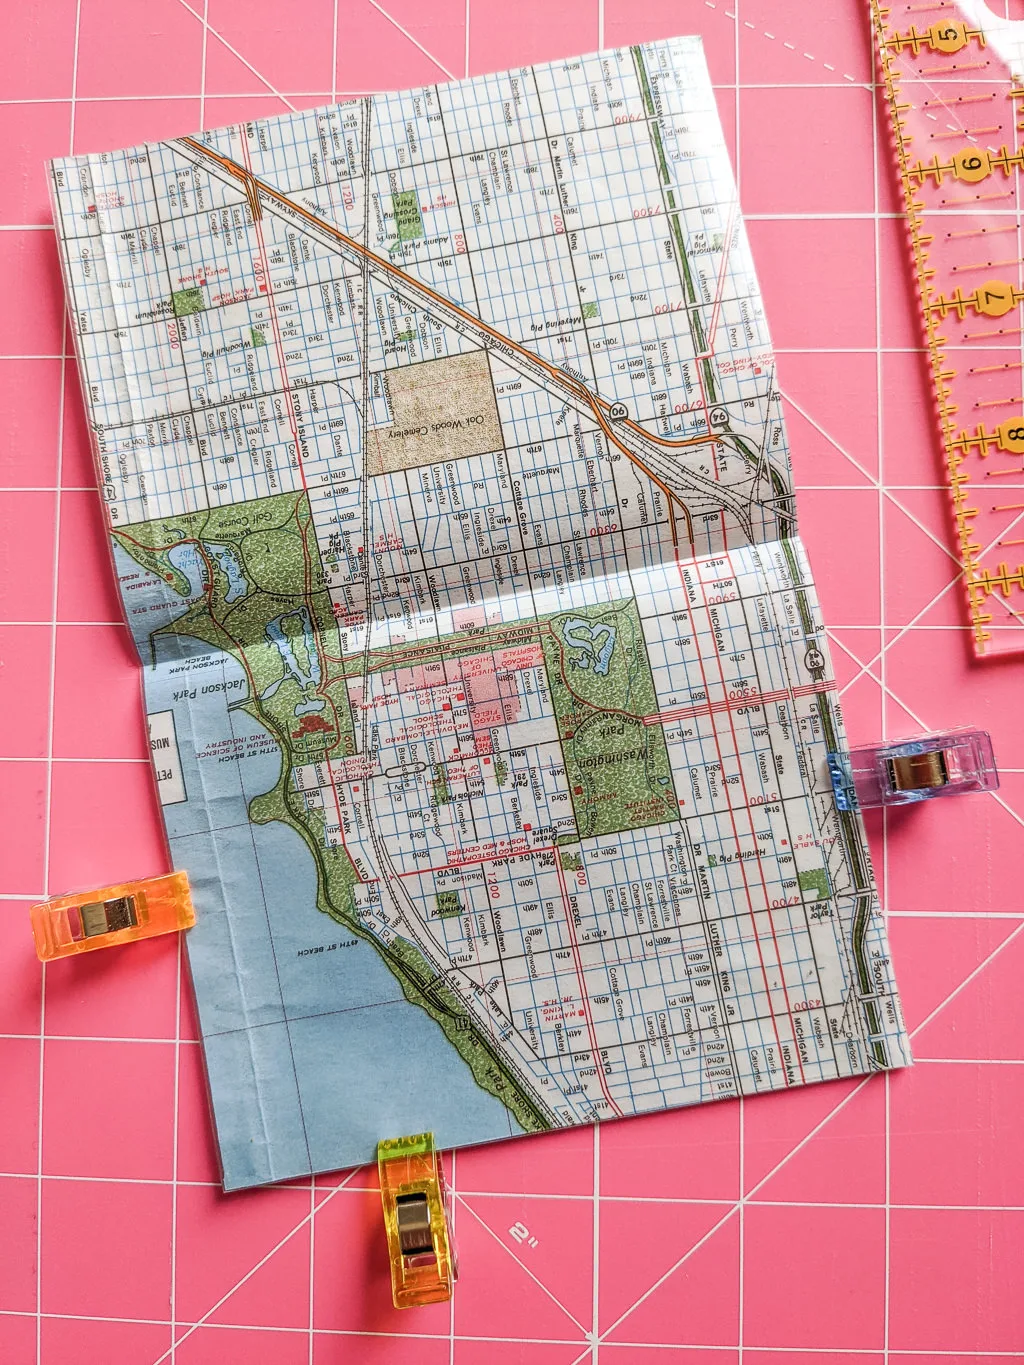
Continue adding Clover Wonder Clips to hold the pieces together. Clover Wonder Clips are great because they don’t leave pin holes in your paper. If you don’t have Clover Wonder Clips, well, you should get them because they’re awesome for sewing paper, vinyl, and fabric. You can substitute barrettes in a pinch.
Step 4: Sew around the card holder perimeter
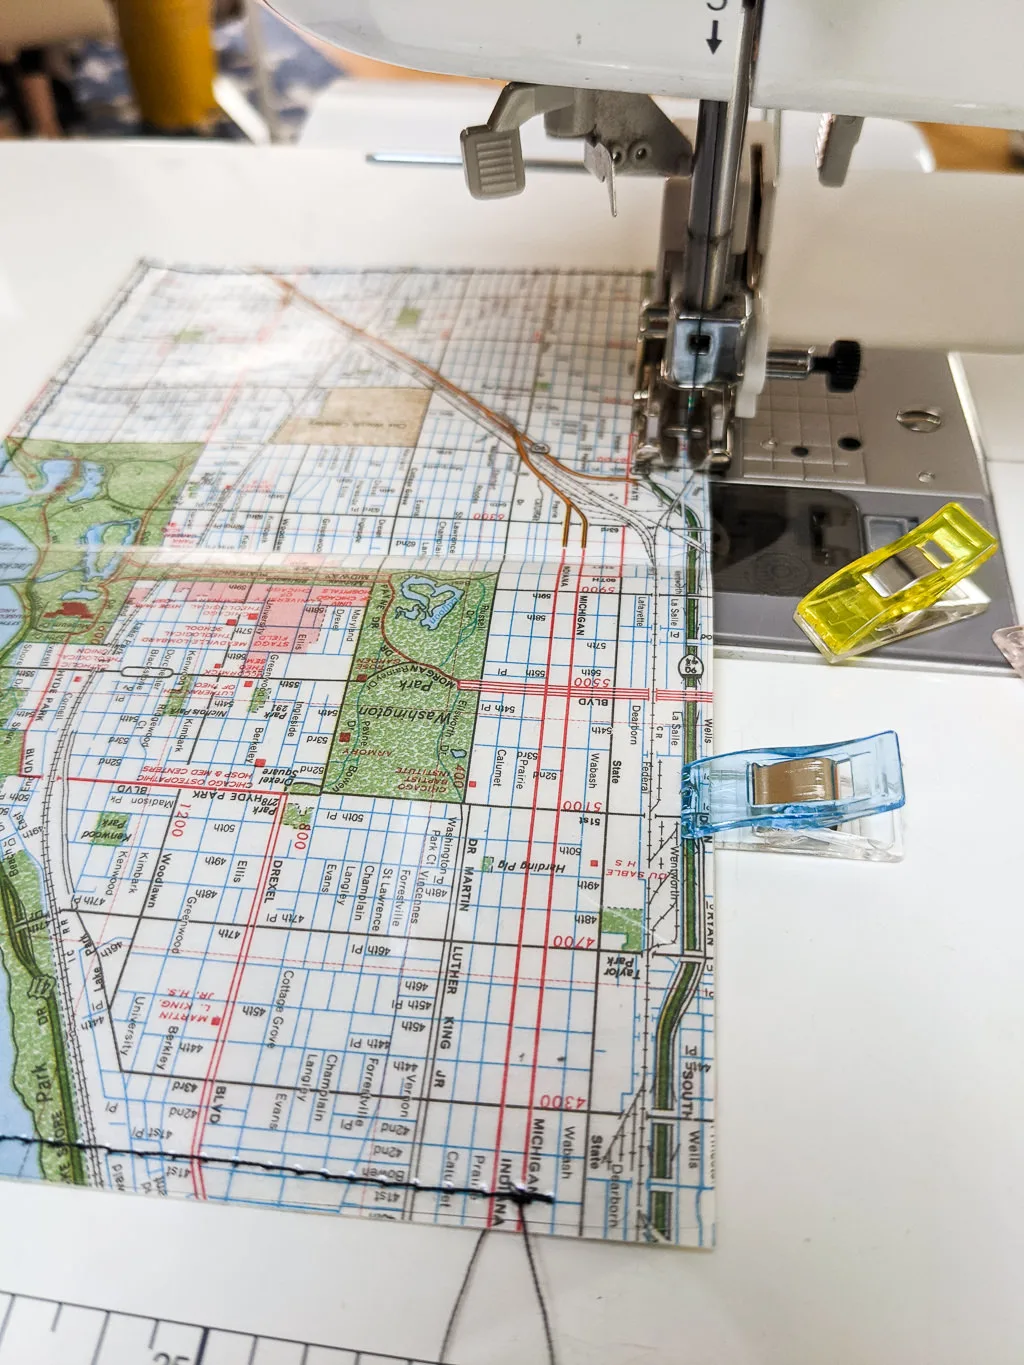
Sew close to the edge of the card holder around the outside, removing the Clover Wonder Clips before you reach them (do not sew over these clips). I like to start sewing at the bottom of the clear vinyl pocket and then circling back around again. Be sure to backstitch.
It’s important to use a walking foot on your sewing machine if you covered your paper with clear contact paper. The clear contact paper makes things a little slippery so the walking foot grabs the plastic well and makes sewing card holders easy. I do recommend testing your sewing machine tension after you put on your walking foot. You may need to loosen up the top thread a bit as I did before sewing your card holder.
Step 5: Flatten the card holder under some books
Fold your card holder in half and tuck under a stack of books for an hour or two. It will form a nice crease that will keep your minimalist card holder closed. You can stop here or add an optional closure.
Step 6: Add optional closure
If you’d like to add a closure as I did, cover your closure piece with clear contact paper like in step 2.
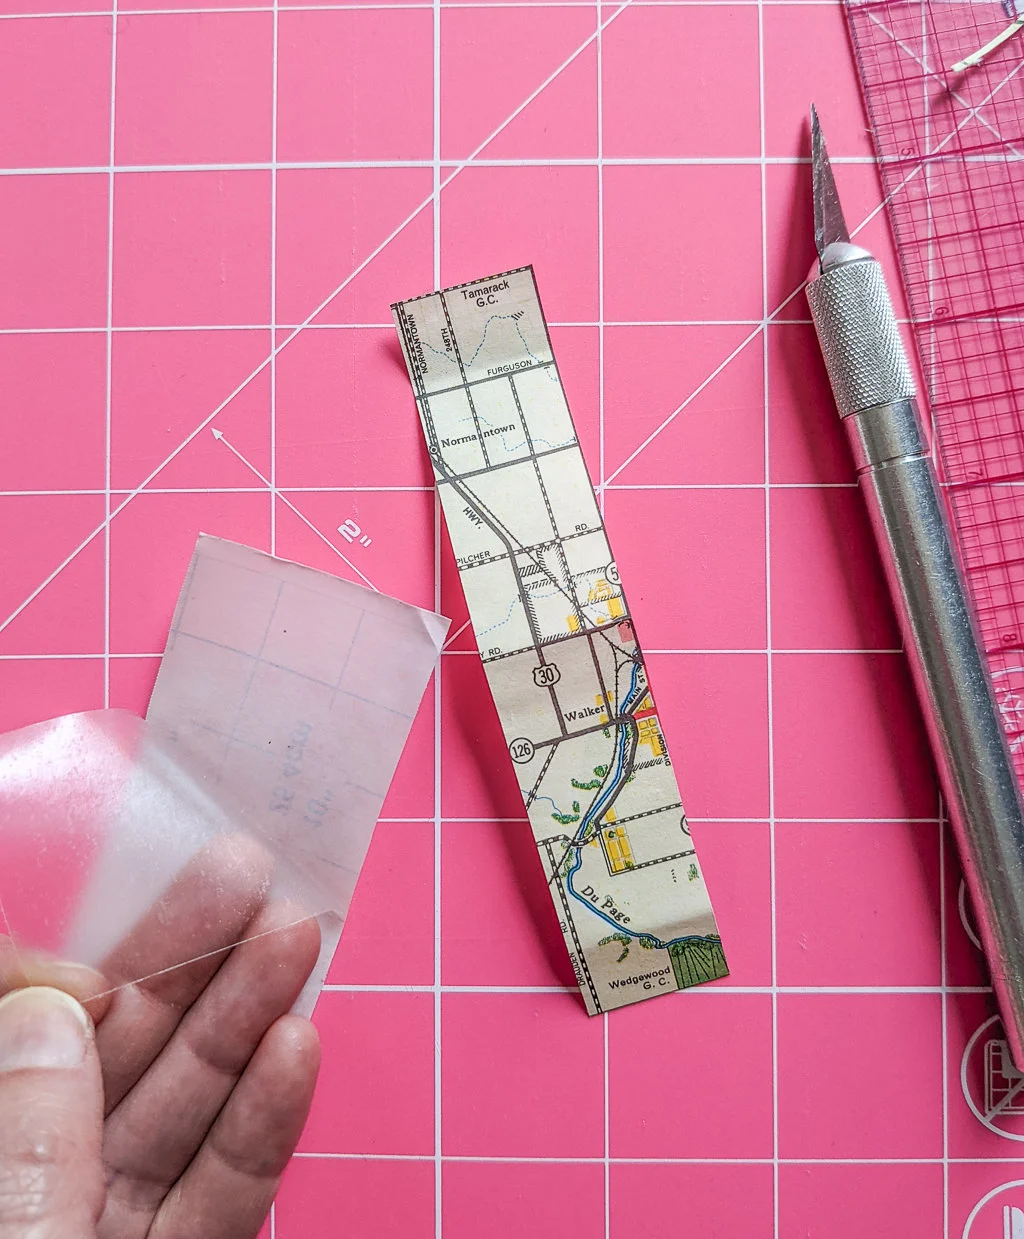
Then fold the closure together in half. The clear contact paper will stick together on the sides. Slice off the overhanging contact paper with a craft knife, metal ruler, and self-healing mat.
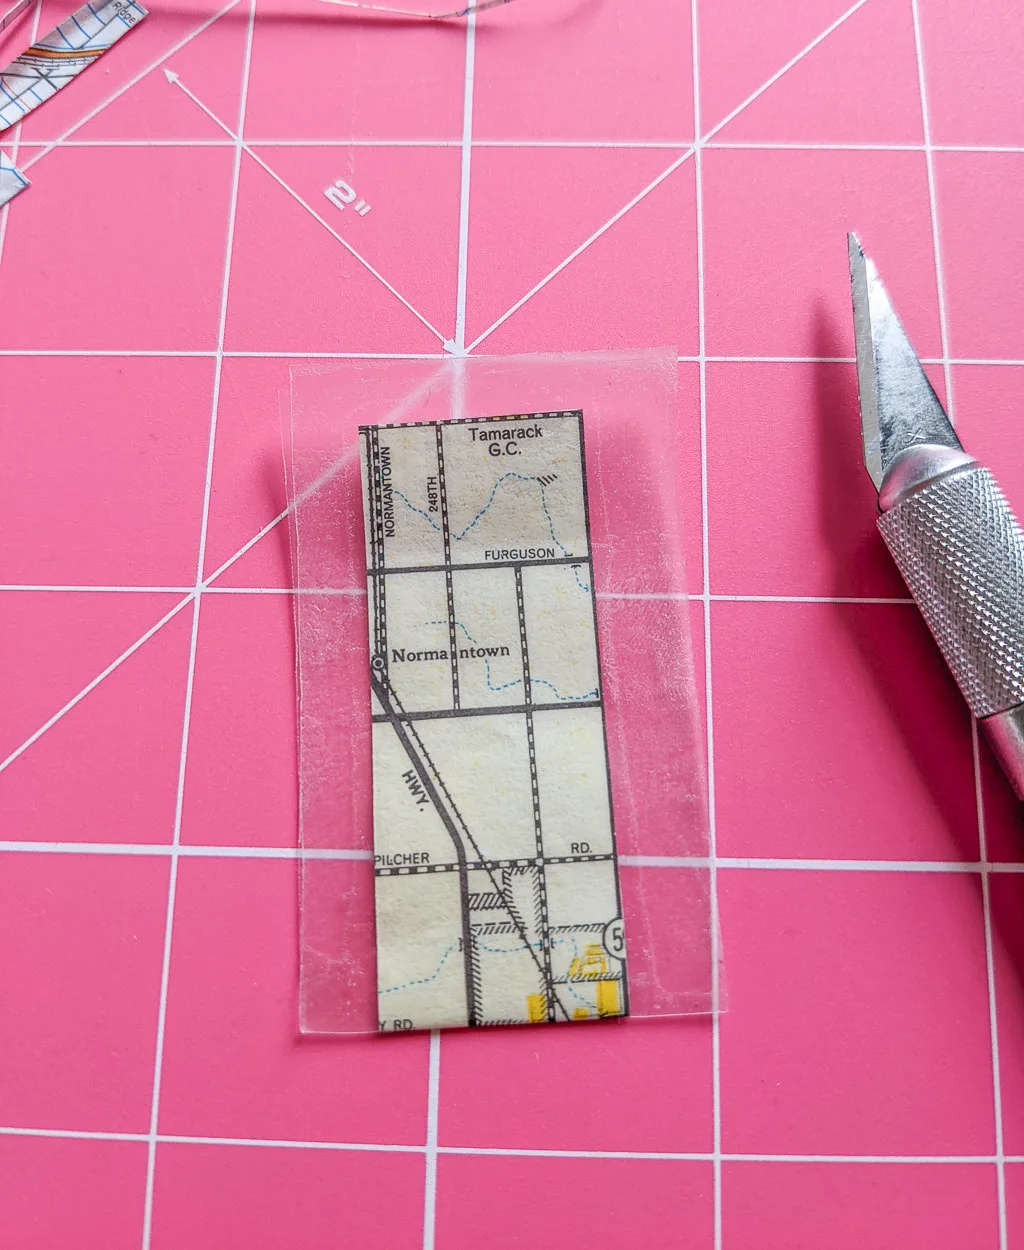
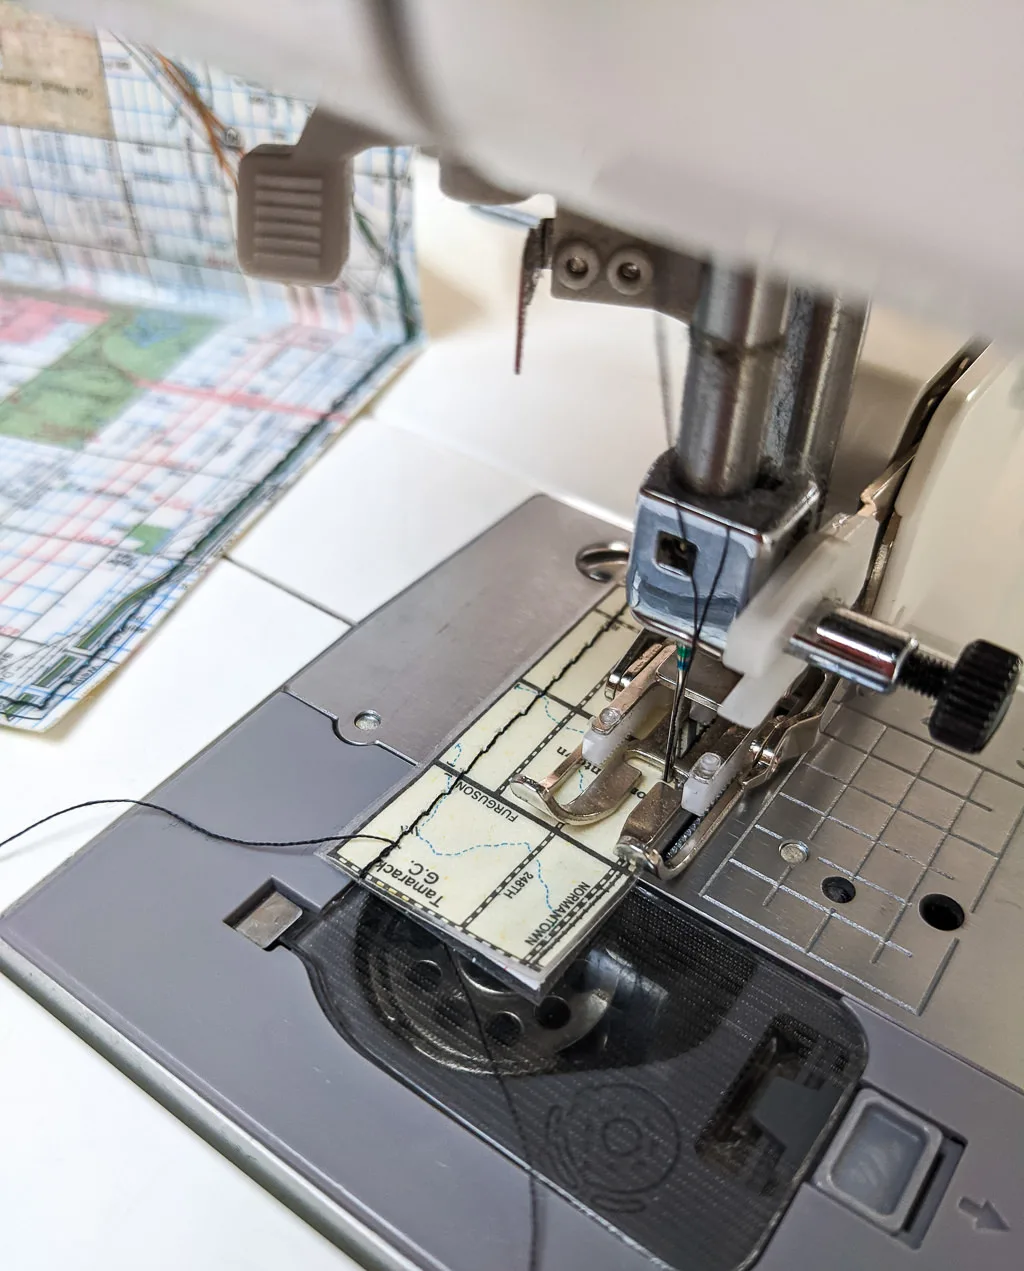
Stitch close to the edges of closure and remember to backstitch.
Step 7: Attach the closure to the cardholder
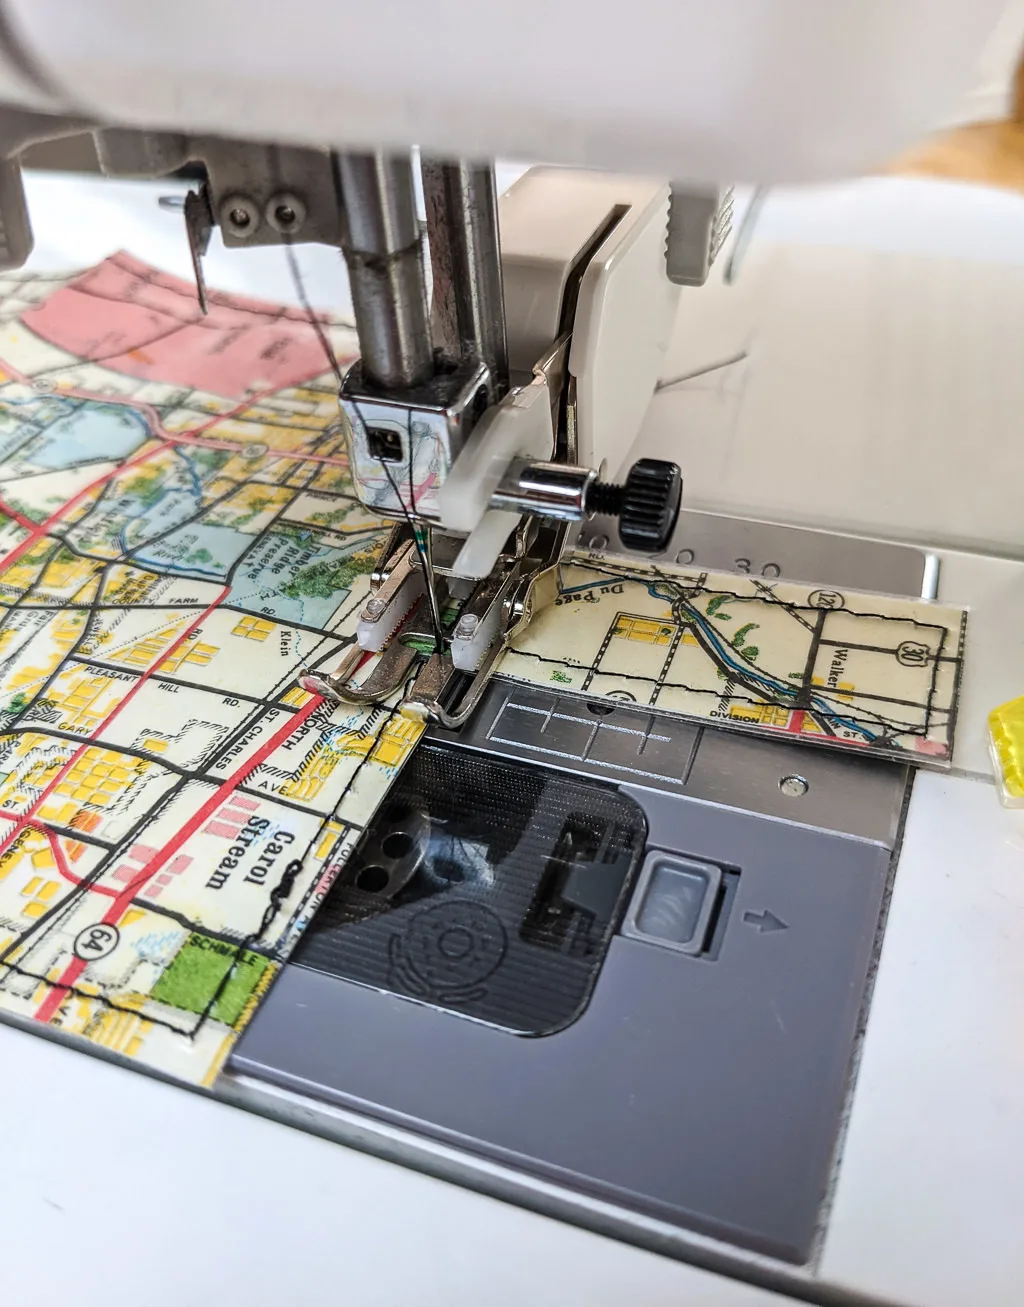
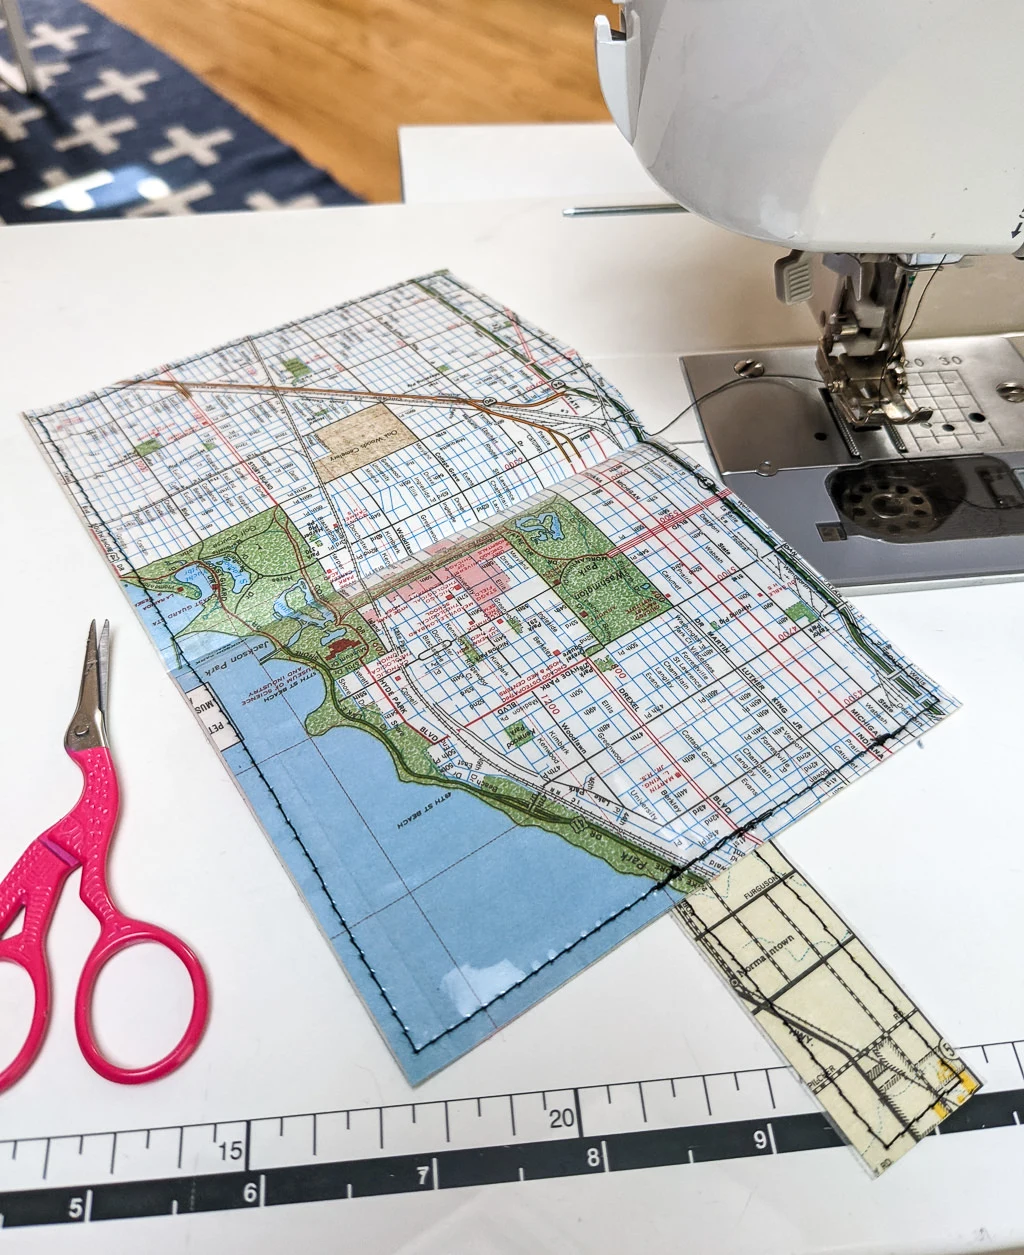
Stitch the closure onto the bottom edge of the card holder. I like to follow the same stitch line that’s already around the card holder. Remember to backstitch.
Step 8: Add VELCRO® brand fastener to the card holder
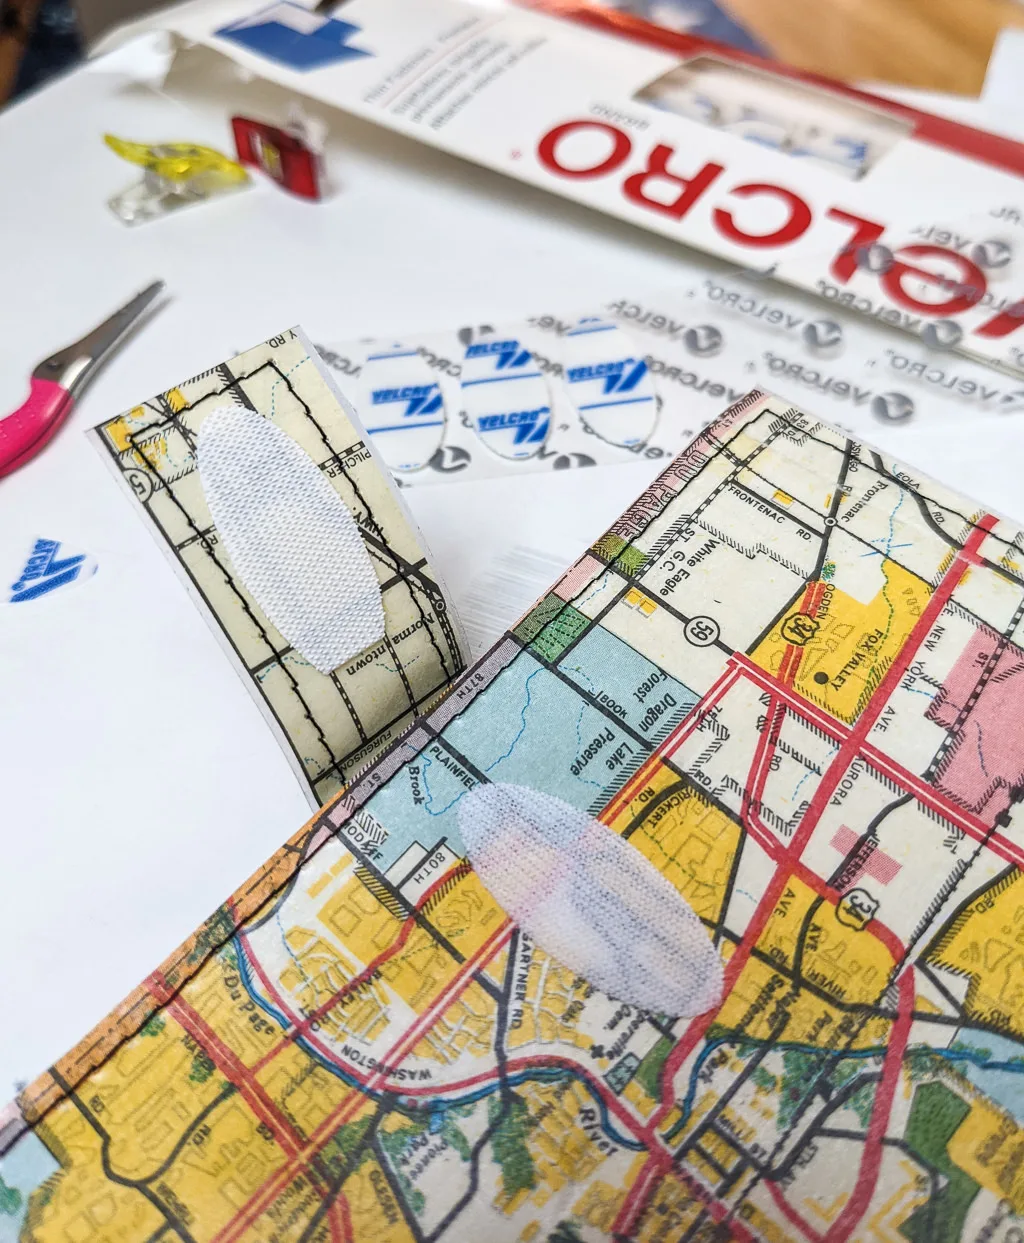
Peel the backs of VELCRO® Brand Thin Fasteners and stick to the card holder. I used the oval thin fasteners but you can use round. Let the VELCRO® Brand Thin Fasteners sit for 24 hours before using for the adhesive to fully adhere. Then add your credit cards, reward cards, vaccine record card, or gift card into the holder.

Be sure to pin my cute card holder DIY from paper or old maps and books:
And see more easy sewing projects like my pencil case free sewing pattern and oven mitt free sewing pattern.
++++++
Like it? Share it!
The nicest way to say you like it is to pin it on Pinterest, post a comment, follow Merriment Design on Facebook, Pinterest, Instagram or sign up for monthly emails. Enjoy! 🙂
