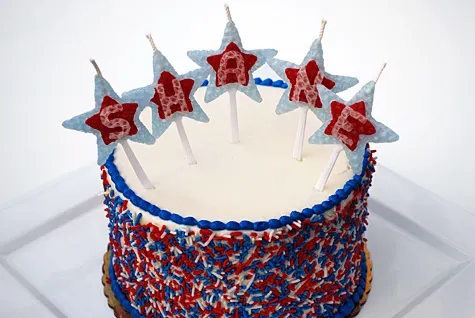
Last year I made a personalized birthday rhubarb berry pie for Shane’s annual 4th of July birthday barbecue. So this year I wanted to make something equally festive …but keep the baking to a minimum.
Back during snowy holiday time I saw this great idea from Martha Stewart (how completely cute are those jumping reindeer and fir trees??). So I had an idea to make personalized star candles for Shane’s birthday cake using cookie cutters.
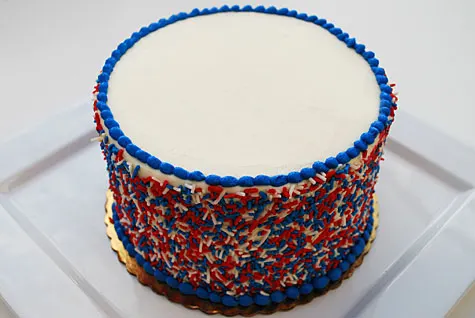
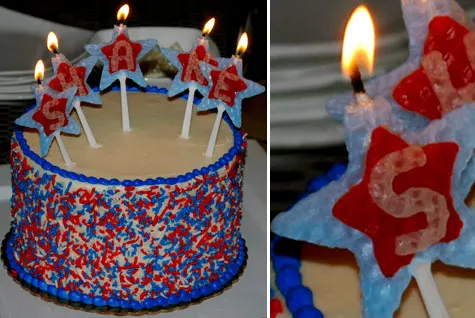
First I ordered a simply delicious and rich three-layer carrot cake with cream cheese icing from Alliance Bakery. I asked them to put red, white and blue jimmies on the sides with a blue icing border and plain top. Cute huh?
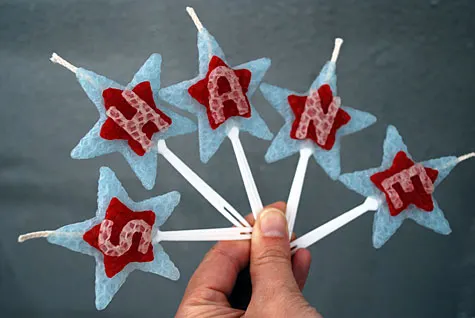
Then I made star-shaped S-H-A-N-E candles for the cake, five candles in all.
Only wrinkle was that I accidentally ordered light cyan blue instead of blue blue (boo for me). But I think it turned out cute anyway.
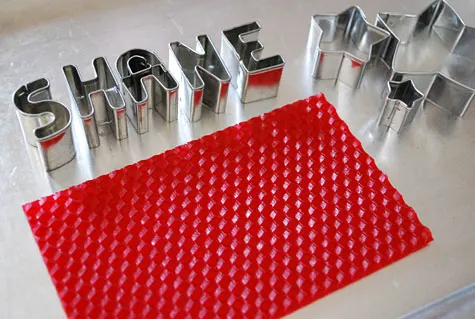
I’ve always wanted to try candlemaking and this craft was pretty easy, I have to say. I see an endless amount of possibilities here with cookie cutters and beeswax sheets. Let me know what you’ve made!
Supplies:
- Colored beeswax sheets (I bought mine from Toadily Handmade – ivory, red and light blue, although I’d recommend a darker blue. Great service and you can mix and match colors in your order if you call or email her first.)
- Metal baking sheet
- Metal star cookie cutters
- Metal fondant star cutters
(these provide smaller star shapes than the ‘cookie’ cookie cutters)
- Tiny alphabet cookie cutters
- Hair dryer
- Candle wicking
- Scissors
- Cocktail picks
Cut shapes
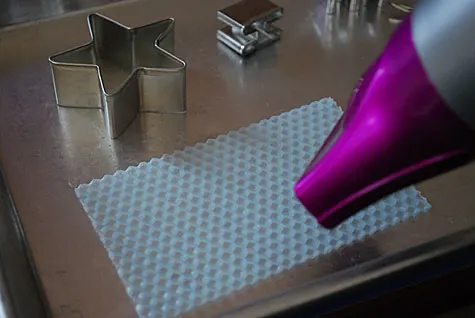
Place one wax sheet on baking sheet. Apply low heat from your hair dryer until slightly soft; it doesn’t take long at all.
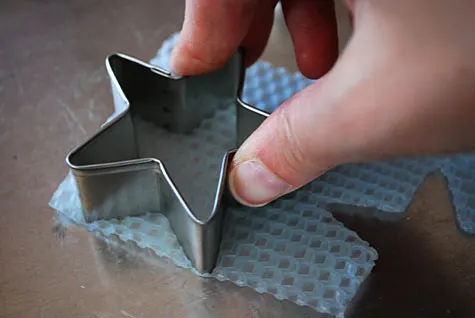
For your base candle, cut 2-6 shapes for each candle depending on the size and thickness of candle that you want to make.
I made small-ish candles for Shane’s cake so I only used 2 shapes for each candle for the base star. But if you want a larger, thicker base candle you can cut 4 or even 6 layers for your base candle.
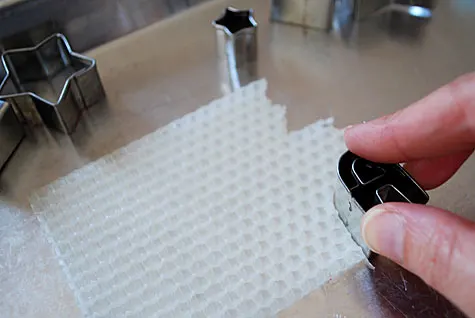
Repeat again to cut your white letters. Use one of your cocktails pick to gently loosen the candle from smaller cutters like the letter cutters. Repeat the process to cut one smaller red star for each candle out of the red fondant cookie cutters (the fondant cutters make smaller shapes).
Note: The cookie cutters will scratch up your baking sheet; if you’re concerned about it you can move the wax sheet to a wood or plastic cutting board once it’s heated.
Create base candle with wicks and picks
Make your base candle by placing one star in the middle of your metal baking sheet.
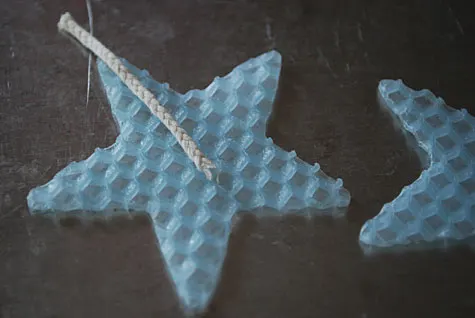
Layer a piece of cotton wicking down the middle, leaving 1/2 free at the top (the end that you’ll light) and 1/2 inch to 1 inch of space at the bottom (I chose 1/2 inch because my candles were small).
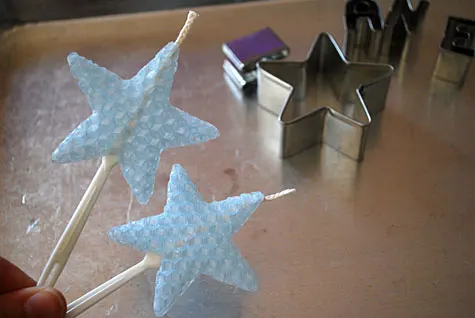
Break off the top of your plastic cocktail pick with your fingers if it sticks up too high like mine did. Put the plastic cocktail pick at the bottom, leaving a bit of space between the cotton wick and the cocktail pick. Place another star on top and press with your fingers to press the layers together. Pinch the edges together and apply low heat from your blow dryer as needed.
Optional: If you are making a larger or thicker candle then layer 2 more shapes, one on the top and one on the bottom, and press with your fingers. Heat the candle using low heat from your hair dryer as needed. This will hide the inside wick more. I knew I was layering on the red star so I didn’t bother making the candle thicker at this point.
Add decorative star and initials
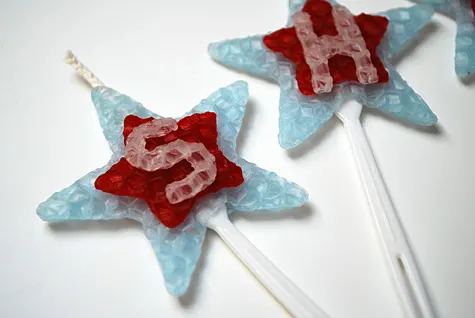
Place one red star on top of your base blue candle.
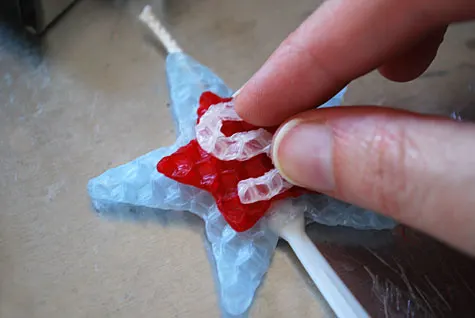
Place your white letter on top of the red star. Heat it using your blow dryer on low and press together to seal.
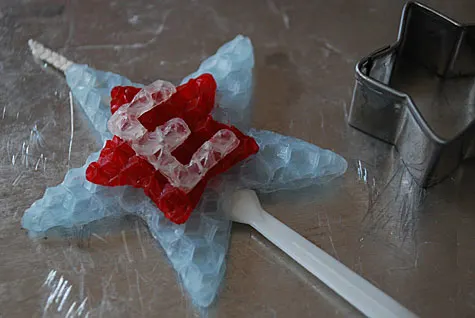
The photos below were taken at nighttime outside with a flash. The candles lit easily and looked great in the dark …with sparkling fireworks exploding overhead. Happy birthday, Shane!

Sarah
Monday 2nd of August 2010
I'm a little obsessed with the idea of making personalized candles! I may never buy birthday candles again!
Katrina
Wednesday 8th of July 2009
I love alphabet cookie cutters! I smash monograms into soap sometimes for the guest bathroom. Fun post!
Susan Short @ Toadily Handmade Beeswax Candles
Wednesday 8th of July 2009
Hi Kathy,
Today I saw a link on my stat sheet that came from your website Merriment Design. It led to my beeswax sheets, so I clicked and saw your candles. The Personalized Birthday Candles are awesome! They turned out so cute, I'm sure Shane and everyone loved them. Your website is great too, I'll be visiting again when I need some craft tips.
I'm available to help your readers with color choices or answer any questions. I'm a huge fan of shopping online, but sometimes the personal touch gets lost. I'm just an email or phone call away!
Thank you for the link in the post as well, I appreciate it! If I can ever be of help in the future please let me know.
Susan www.toadilyhandmade.com (seller of the beeswax sheets featured in this post)