I went with my friend Liz to the local tattoo parlor to watch her get a tattoo of two baby birds to represent her boys. Graphic designer Liz had drawn the tattoo in Adobe Illustrator and brought a printout to scan. Unfortunately, the tattoo artist told Liz that while the design looked great on paper it would end up looking like two blobs once on her skin. Oof.
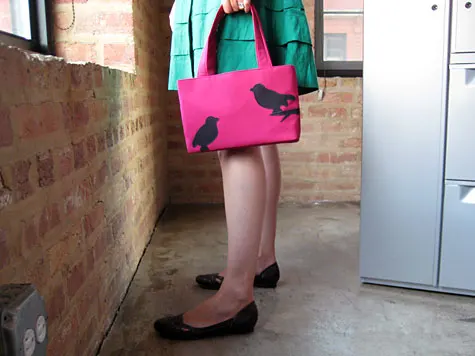
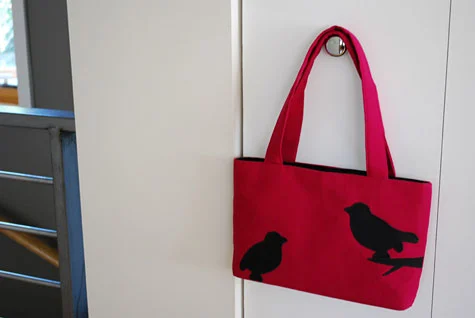
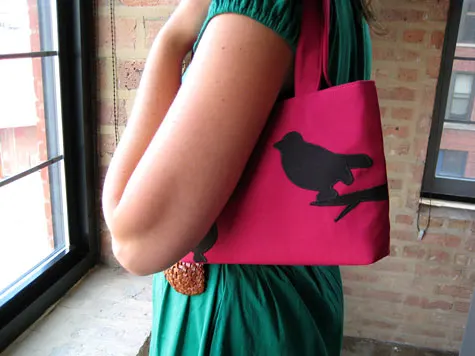
So for Liz’s birthday I decided to make her a cheery magenta wool handbag with two bird silhouettes for her boys. I’m a little out of practice making handbags so it took me some time to shake off the rust and design this free handbag pattern. Please enjoy. And happy belated birthday, Liz!
Supplies:
- Free bird pattern (I actually traced around Anthropologie’s recent bird-shaped gift tag …so thanks Anthropologie!)
- 1/2 yard magenta wool gabardine fabric from Fabric.com
- Iron-on craft weight interfacing
(buy 2)
- Heavyweight sew-in interfacing
- 1/2 yard black cotton fabric
- Thread
- Magnetic Snap
- 9 7/8″ x 1 7/8″ piece of plastic or cardboard for the handbag bottom (I use .06 thick plastic styrene)
- Rotary fabric cutter
- Clear fabric ruler
- Self-healing mat
- Good fabric scissors
- Sewing machine
COPYRIGHT NOTE: You’re more than welcome to use this project and pattern for your own personal use. Please post a comment below or email me if you use this project so I can smile when I see that it’s being used. Craft and pass it on!
Cut the pieces and interfacing
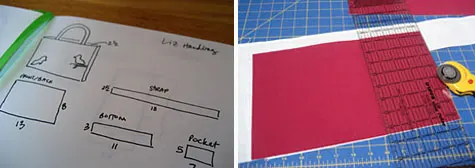
Cut out the apron pieces using a rotary cutter, clear fabric ruler
and rotary mat
:
Outside fabric (I used magenta wool gabardine from Fabric.com)
Front and Back (cut 2): 13” wide x 8” tall
Bottom: x” wide x x” tall
Straps (cut 2): 18″ wide x 3 1/2″ tall
Lining fabric (I used black cotton)
Front and Back (cut 2): 13” wide x 8” tall
Bottom: 11″ wide x 3″ tall
Pocket: 7″ wide x 5″ tall
Heavyweight sew-in interfacing
Front and Back (cut 2 …or 4 if you want a stiffer handbag): 13” wide x 8” tall
Craft weight fusible interfacing
Straps interfacing (cut 2): 18″ wide x 3 1/2″ tall
Bottom interfacing (cut 1): 11″ wide x 3″ tall
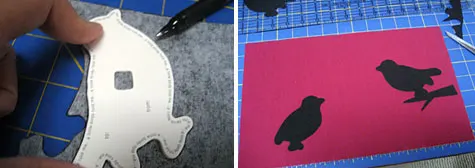
Appliqué birds and branch (or your own shape) to front. Cut a square of iron-on interfacing about twice the size of the bird shape. Iron onto the back of the black fabric. Place the bird shape onto the back and trace the bird shape. Flip the bird shape over and trace again. Now free-hand draw a branch for one of your birds to perch on. Cut out all shapes. I cut off the tail of the second bird so it looked younger.
Place one (or two for stiffer bags) of the sew-in interfacing rectangle on the wrong side of your front rectangle. Arrange the birds and branch on the right side of the front rectangle, remembering that anything within the 1/2 inch border of the rectangle will end up being inside seams. Personally, I put the tree-side end of my branch within the seam.
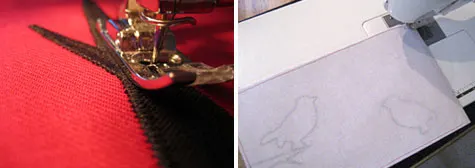
Stitch your birds and branch down using a tight zigzag stitch. Flip the front over and stitch the sew-in interfacing to the wool around the edge of the rectangle to make the front piece easier to work with in later steps. Repeat by stitching your other interfacing square (or two for stiffer bags) onto the wrong side of your wool handbag back rectangle.
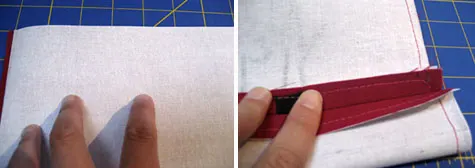
Attach front to back on left and right sides. Put your front rectangle on top of your back rectangles, right sides together (your birds will be inside the sandwich). Sew the left and right sides of your front to your back using a 1/2 inch seam. Be sure to leave the top and bottom open.
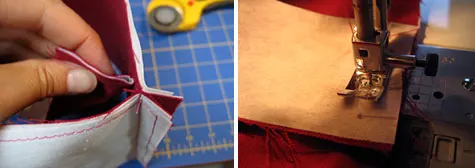
Attach short sides of the bottom. This part can be a bit tricky so read it a couple of times before you do it. Iron interfacing onto the wrong side of the wool bottom. Measure 1/2 inch from each side and mark a circle on the wrong side with a pencil (you can see my circle in the upper right picture). Fold the short end of the bottom piece in half, wrong sides together, to find the middle point. Line the middle point of the bottom piece to the middle of the front/back seam (see upper left picture). Pin the bottom to the front/back, right sides together. Sew across the bottom between the circles. Repeat this step on the other short side.
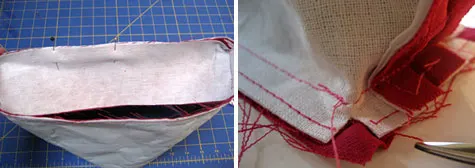
Attach long sides of the bottom. Pin one of the long sides of the bottom piece to the front of the handbag, right sides together. Sew at 1/2 inch seam along the long edge. Repeat on the other side. Take your scissors and clip each of the four corners so that the bottom will lie flat. Now the body of your handbag is done and you’re ready to make your lining.
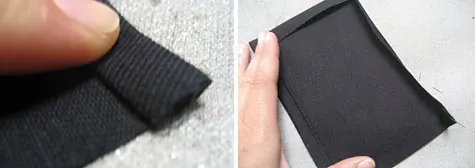
Prepare inside pocket. Take your pocket and fold the top raw edge under 1/2 inch, wrong sides together. Now fold again 1/2 inch. Your raw edge should now be hidden (see upper left picture). Sew it down along the edge. You’ve created the top of your pocket. Now iron down each side 1/2 inch.
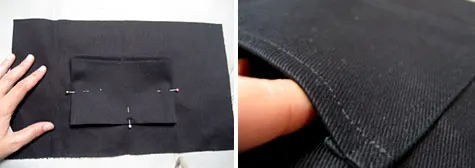
Attach pocket to inside lining. Put one of your lining rectangles on your table, right side up. Place the pocket 2 inches from the bottom, centering it between the sides. Sew the pocket to the lining around the outside. I like to sew two rows of stitching, one at 1/2″ and one at 1/4″.
Attach lining front to back along sides. For this step you’re basically repeating the way you created the handbag outside. Put your front rectangle on top of your back rectangles, right sides together (your pocket will be inside the sandwich). Sew the left and right sides of your front to your back using a 1/2″ seam. Be sure to leave the top and bottom open.
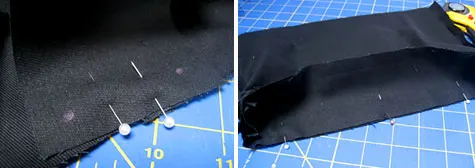
Attach lining short sides of the bottom. Again, you’re repeating what you did on the handbag outside. Measure 1/2″ from each side and mark a circle on the wrong side with a pencil (you can see my circle in the upper left picture). Fold the short end of the bottom piece in half, wrong sides together, to find the middle point. Line the middle point of the bottom piece to the middle of the front/back seam. Pin the bottom to the front/back, right sides together. Sew across the bottom between the circles. Repeat this step on the other short side.
Attach lining long sides of the bottom. Pin one of the long sides of the bottom piece to the front of the handbag, right sides together. Sew at 1/2″ seam along the long edge. Repeat on the other side. Take your scissors and clip each of the four corners so that the bottom will lie flat. Now the body of your lining is done.
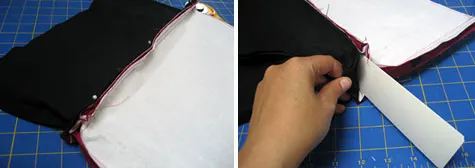
Attach lining to the wool handbag outside. Pin the bottom of the lining to the bottom of the wool handbag outside. Sew 1/2″ around three sides, being sure to keep one of the short sides open. Slip your piece of plastic or cardboard in-between the bottoms.
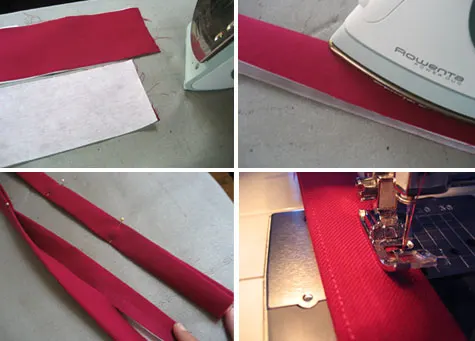
Make straps. Iron the strap interfacing onto the wrong side of the straps. Fold the strap in half lengthwise and press. Open the crease. Now fold each side into the middle crease. Fold in half again to enclose the raw edges. Sew the long edge of the strap, about 1/4″ from the side. Repeat on the other long side. Now repeat to make the second strap.
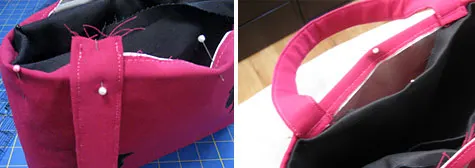
Attach straps. Pin one strap to the front of the handbag, 2 1/2″ from the left side seam. Sew 1/4″ close to the edge to secure the strap to the handbag. Repeat on the right side and now the front strap is attached. Now repeat to attach the second strap onto the back of the handbag.
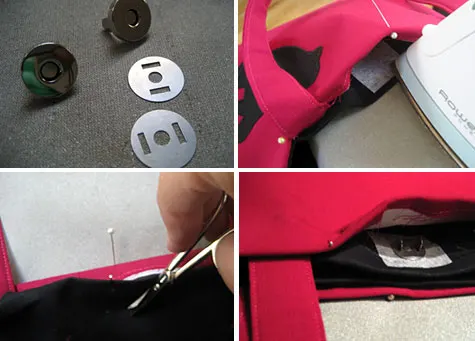
Put in metallic snap. Metallic snaps come in four pieces: front, back and two washers. Fold the wool outside down 1/2″ towards the wrong side. Now fold the lining down 1/2″ towards the wrong side around the circumference of the lining. Measure and find the middle of the bag and put a pin to mark the center. Cut a small piece of iron-on interfacing and iron in the middle of the wrong side of the front lining (I interface it so that the metallic snap is even more secure and wears better). Position the top edge of the snap 1″ below the folded side of the lining. Mark where the two snap pins hit using a pencil or pen. Cut two small holes in the front lining at your markings and slip the snap pins through to the other side. Slip on the washer and fold down per the package instructions. Now line up the back snap onto the back lining, being super careful to make sure the back snap is in the middle so it will line up with the front snap. Repeat instructions above to put the back snap on the back lining piece. Now your snap is in.
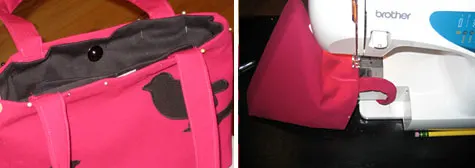
Close handbag and enjoy. Pin the lining to the wool outside. Sew close around the circumference of the handbag, about 1/4″ from the edge. Be sure to backstitch. Carry it well!
COPYRIGHT NOTE: You’re more than welcome to use this project and pattern for your own personal use. Please post a comment below or email me if you use this project so I can smile when I see that it’s being used. Craft and pass it on!

Maddie
Sunday 10th of June 2012
I love the baby bird and am going to make a cushion using the template. Thank you
Zon
Wednesday 27th of July 2011
Love the look of your bag and am looking forward to making it! Thank you for sharing it. :)
Satina
Wednesday 30th of March 2011
Love the bag! Can't wait to make one
Sil
Tuesday 22nd of February 2011
Hello I'm posting the Baby Bird Silhouette Appliqué Handbag with proper link to your page in my blog revenue, templates and much more (http://quiosquereceitas.blogspot.com/) to others can be inspired by this wonderful tutorial. Thanks for sharing it. I'll be happy with your visit. God bless you
Kathy Beymer
Thursday 24th of February 2011
Thanks so much! I appreciate it.
cookie
Friday 22nd of May 2009
What a good gift, your friend didn't get a goofy 'tat' AND she received a beautiful bag made with great care. I respect your care and sewing expertise.