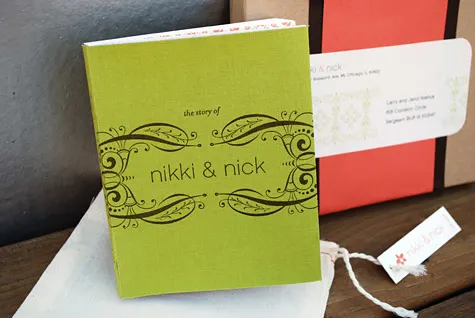
Holy smokes! This invitation by Nick and Nikki Lo Bue is one of the most amazing wedding invitations I’ve ever seen.
Nick and Nikki had a charming story behind their relationship which inspired them to make this stunning book as their wedding invitation. Making the wedding book gave the couple a fabulous opportunity to tell their story to friends and family as well as give guests a cute keepsake.
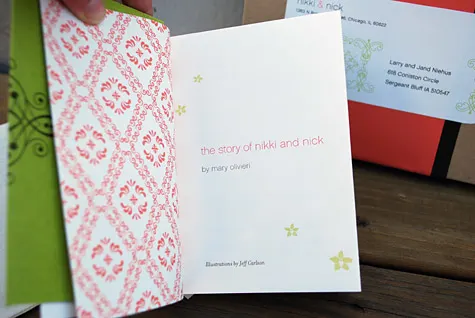
They asked a dear friend who also happened to be a copywriter to write their story and worked closely with their friend Stacey Stern at Steracle Press to help bring their wedding book concept to reality.
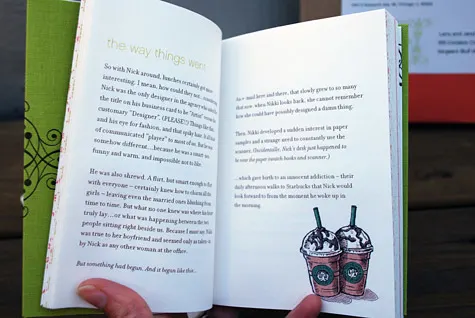
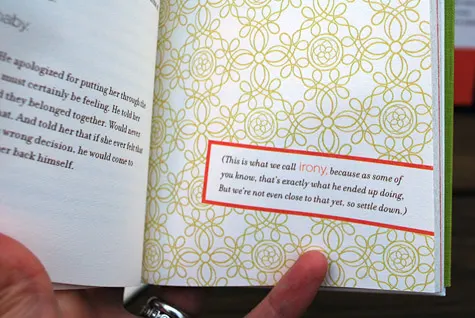
Nick’s friend Jeff Carlson drew the super cute color illustrations such as the couple’s daily Starbucks runs at work where they met, the home-y Chicago skyline, and more.
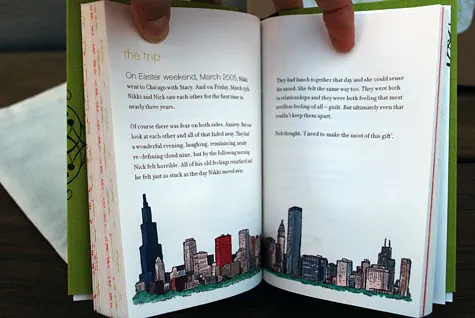
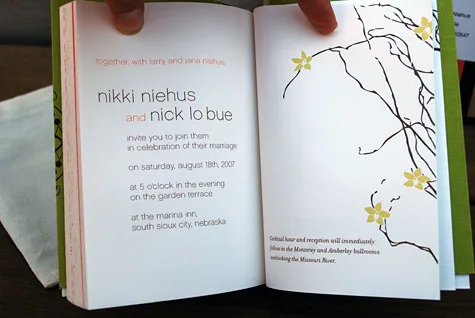
The wedding book begins with the story of how Nick and Nikki met at a Chicago design firm, followed by the unique story behind their relationship including daily Starbucks runs and a move for one to Austin and back, and Nick’s proposal, ending with the formal wedding invitation/details.
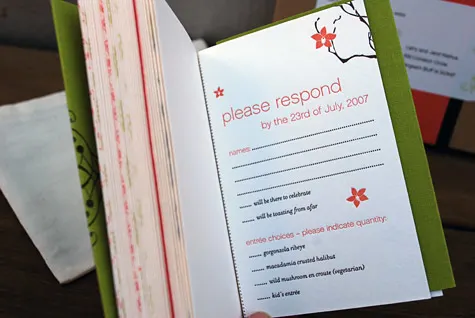
Nikki included a perforated and stamped RSVP postcard at the end of the book for guests to tear out and mail.
Wherever possible, Nikki used archival paper/elements to create the book to ensure that it will last a long time without yellowing or showing signs of age. Suppliers are listed later in this post.
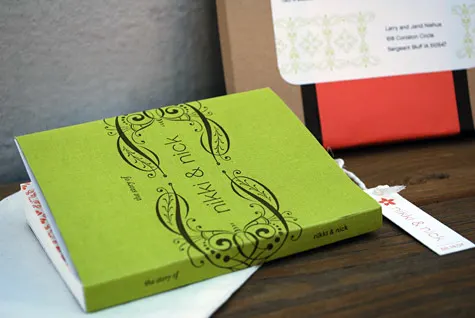
Not only did Nikki make the invitations but also the lovely letterpressed fabric book jackets, mailing labels, belly bands around the boxes as well as the ‘nikki & nick’ tags on the cloth drawstring book bags.
Nikki has kindly documented free step-by-step DIY instructions and supply lists after the jump. We request that if you use this idea or instructions, please post a comment below. Enjoy making your very own smythe sewn book!
NOTE: The instructions that follow are not for the faint of heart. Fortunately, graphic designer Nikki is available to provide her services to you. Feel free to contact Nikki at Caliente Creative. Lucky you!
How to Make Book Pages
- 8.5”x11” sheets of paper
for book pages (we used Crane’s pearl white wove unwatermarked paper, which is an archival sheet and ordered it through Lewis Paper)
Use a page layout program to design/layout your book pages; a page layout program such as Adobe InDesign or QuarkXpress would be best, but Microsoft Word could work if you do not have access to a page layout program. Layout your book pages in reader’s spreads in landscape format, knowing that the finished size of each page will be 5.5”high x 4.25”wide when the page is folded. Allow 1.125” margins on the right and left edges of your document (you will need the extra width when the pages are folded and stitched so that the content of your book is far enough away from the spine). Allow at least .375” margins on either side of the center of your document. A good margin to use for the top and bottom is .75” or 1”.
After you have completed your layout for your book, you will need to imposition your document pages, meaning you will sequentially reorder the pages by shifting each page one page to the left in your document (so your document pages will no longer be in readers spreads, but once you fold the printed pages and put them in sequential order, they will be in readers spreads once again). After you have prepped the pages, you may want to print out a copy of your book and make a dummy to make sure all of your pages are appearing in the correct order.
Once you have imposed your document and prepped it for printing, you can print the book pages yourself if you have the capability, or have someone else print them for you.
Fold your printed pages in half to be 5.5”high x 4.25”wide. To make a really crisp edge, press a Teflon Bone Folder along the folded edge. Sequentially order your folded book pages and set them aside.
How to Make Letterpressed Front and Back Book Covers
Choose a cover weight paper for the front and back covers of your book, and create your design. You can print the covers yourself if you have the capability, or you can send them out to be printed by someone else. We designed our front and back book covers and had them letterpressed on Crane’s Lettra Pearl White 110# Cover stock, which was an archival paper made specifically for letterpress printing; it also matched the paper stock we used for the pages of our book.
If you choose to have your book smythe-sewn, check with your binder to find out what size they would like to covers to be – they will likely want them to be larger than what the finished size of the book will be, because they will line up the pages of the book and trim off any excess so that the finished edges of the book pages will all be flush. Our book covers were 4.375” wide x 5.75” high before sending them out to be smythe sewn and trimmed.
If you will not be having your books smythe sewn, you can make the document size for the covers to be the finished size of the books – 5.5”high x 4.25”wide.
Once you have your front and back covers, you can send them out along with your book pages to be bound.
Optional: Make perforated RSVP card
Since our books were also our wedding invitation, we included a perforated and stamped rsvp postcard at the end of the book, which our guests could tear out and send to us. The front of the postcard asked the usual rsvp info (name, how many guests would be attending, meal choice, etc.), and on the backside we included an area where the guests could write us a note if they wanted to.
We had our rsvp card letterpressed printed, and so our letterpress printer perforated the cards for us after they were printed. We worked with our smythe sew binder to determine what the size of the card should be, and how far away the perforation needed to be from the spine. Our rsvp cards were 4.375” wide x 5.75” high before sending them out to be smythe sewn and trimmed, and were perforated .75” away from edge of spine on the long side of the book (the 5.75” side). The cards were letterpressed on the same paper stock as our front and back book covers, using the same ink colors.
Smythe sewn book binding
If you have a really thin book you could probably try and stitch it yourself by hand or on a machine. If you have a thick book like we did, you will need to send out your book components to be professionally bound. Research book binders in your area to find a vendor who can smythe sew (stitch bind) the books. It may help to go through a printer – chances are they will have the capability to bind books in-house or will have a trusted vendor that they use. Ask the binder to see some thread samples so that you can decide which color you would like to use. They can also advise you on various details such as how far away the stitching will be from the spine, and how far apart each stitch will be. When you have all the book components ready (front covers, back covers and interior pages), you can send the components out to be Smyth sewn and trimmed. Check with your binder first to find out how they would like to receive the book components – if they have the capability to trim the books after they have been sewn, they will most likely prefer the covers and interior pages not to be trimmed to size because they will do it themselves, which will affect the size of all the book components.
How to Make Letterpressed Fabric Book Jackets
What lovely green fabric book jackets covered the books.
Supplies:
- Good iron like Rowenta
- X-Acto knife
- Pencil
- Large cutting mat
- Ruler
- Teflon Bone Folder
- Wax paper sheets
- Book fabric (Rainbow Ecological Fiber – we used Rainbow Brillianta 4250 Lime, which came in a 52.5” yard roll)
- Oversized text weight paper (we used 26” x 20” sheets of solid paper from Paper Source)
- Fusion 4000 acid free adhesive (comes on a 40.5″ x 30” yard roll from Talas)
Turn on your iron to the heat setting specified in the directions that came with the Fusion 4000. Using a pencil, ruler and an exacto knife, trim the book fabric and Fusion 4000 into 26” x 20” sheets to match the size of the Paper.
Next step is to iron the book fabric, Fusion 4000, and paper together; heating the Fusion 4000 activates the adhesive, which will seamlessly fuse the book fabric and paper to make your jacket. For the best results, follow the instructions that came with the Fusion 4000 and do some test runs until you get the hang of the method. If you would like to have a design letterpressed onto your book jackets, it would be a good idea to save some of your imperfect jackets so you can give the samples to your printer. They can use the jacket samples to do some test prints to make sure the printing process will produce desirable results.
The order of the layers should go (from top to bottom): 1 large sheet of wax paper, book fabric, Fusion 4000, paper. Place your iron on top of the stacked elements and quickly and thoroughly iron all areas of the sheet, moving the wax paper with you as you iron (using the sheet of wax paper will allow you to move the iron more freely over the element, while protecting the elements from being burned by the iron, or having any of the Fusion 4000 adhesive accidentally getting onto your iron).
When you are finished ironing, let the jacket cool and then use magazines or books to weight it and keep it flat – this will help prevent warping and curling.
If you are not going to have a design printed on your jacket, you can trim the jackets down to their final size with an exacto knife, ruler, and a cutting mat. Be sure to use a sharp exacto knife blade when you are trimming; using a dull blade will cause the fabric to fray as you trim. The final size of your book jacket will depend on the height width, and thickness of the finished size of your book. To determine what the (flat) length of your jacket should be, add the width of the front and back covers to the width of the spine, then add 1/8”. Try making a test jacket and fitting it on the book first to be sure it will fit before trimming down all the rest of your jackets.
Place the fabric side of the jacket face up, and measure the width of your book. Then, in the center of your jacket, lightly mark the width of the spine at the top and bottom of the jacket with a very sharp pencil. It may help to center the spine of your book face down in the center of the jacket and use that as a guide to place your marks. After you have marked the width of the book spine, work your way out to mark the next set of score marks, which should be the width of the book cover +1/16”. Take that measurement and mark the width on either side of your spine marks (these are the score marks that will enable the jacket to wrap around the front and back covers of the book). After you have finished making your marks, line a ruler up to the corresponding marks at the top and bottom edges; and, with the end of the Teflon folder (whichever end you feel most comfortable using) press a line into the jacket.
Optional – printing:
If you choose to have a design printed on your jackets, you will need to do a little research and find a printer (I recommend using a letterpress printer) who has the ability to print on the book fabric you would like to use. Once you find a printer, you can work with your printer to find out what size the book jacket sheets need to be before they can be printed on – sizes will vary depending on the size of their letterpress.
Layout the design for your book jacket, and include crop marks to indicate the final (flat) trim size of the book jacket. If possible, ask you printer if you can approve a print so that you can know what to expect to see in the final product,
Once you receive the printed jackets back from the printer all that will be left to do is to score, fold, and wrap them around your book.
Optional finishing touches…
Boxes, bags and padding
A nice way to protect and contain your book is to place it in an appropriate-sized fabric drawstring bag (you may want to iron the bag first to remove any wrinkles).
Supplies:
- 5” x 7” cloth drawstring bags from PackCo
- 7” x 5.5” x 1” kraft jewelry boxes from Uline
- Peat Moss, crinkle paper, or tissue paper for padding
If you are going to mail your book or give it someone as a gift, you can place the book into a lined box (such as 7” x 5.5” x 1” kraft jewelry boxes from Uline). Unless the book fits snugly in the box, you will need to use a material to pad the box to protect the book from moving around and potentially damaging the book. A few ideas for padding are: peat moss, crinkle paper, and tissue paper. Line the box with your desired material, place the book in the box and close the lid.
Tags
As a finishing touch on the bags, you can tie a personalized tag onto the end of one of the drawstrings of the bag.
Supplies:
- Good iron like Rowenta
- X-Acto knife
- Pencil
- Ruler
- Large cutting mat
- 1/8” round hole punch
- Paper
to print the tags yourself, or a design file with crop marks (to indicate final tag size) to have someone else print them for you
We designed 3”high x.75”wide tags to tie onto our bags. The tags were letterpressed with our names and wedding date, using the same paper stock and ink colors as our letterpressed book covers. Personalize your tags with your desired design and then either print them yourself or have someone else print them for you. Once you have your printed tags, use a cutting mat, exacto knife and a ruler to trim them down to size (be sure to include crop marks in the print file so that you can use them as your guides).
After the tags are trimmed, use a 1/8” round hole punch to punch the tops and turn them into tags. Loop one of the drawstrings on the bag through your tag, tying a knot at the end of the string so that the tag will not fall off. Place your book inside the bag, cinch the top closed, and tie the drawstrings into a bow.
Belly Bands for your boxes
For a finished look you can apply a bellyband and a label to the box to firmly secure the lid.
Supplies:
- 26” x 20” sheets of solid text weight paper from Paper Source
- X-Acto knife
- Pencil
- Large cutting mat
- Ruler
To create the double-banded belly bands, use two complimentary sheets of oversized text weight paper (we bought two colors of 26” x 20” sheets from Paper Source, but you can use any paper you want as long as the paper will be long enough to allow you to wrap it around your desired box with a little bit of overlap where the ends meet).
Decide which color you would like to use for the top of the bellyband, and which color you will use on the bottom. Using a ruler, exacto knife and cutting mat, trim the paper you would like top use as the bottom of the bellyband into 4.25”wide x 14”long strips. Trim your other paper stock into 3.5”wide x 14”long strips. Center the top strip on the bottom strip and use a glue stick to glue the top strip to the bottom strip to create your double-banded belly band.
Put your bellyband face down on a flat surface, and place your box right side up and centered within the middle of the bellyband. Loosely wrap the bellyband up and around the edges of the box – the ends should meet as close as possible in the center of the top lid of the box. Once you like the placement of the bellyband, use a glue stick to apply some glue to the bottom area of the box where the bellyband will fall and press down firmly so that the bellyband and box stick together. Tightly fold the edges of the belly band up and around the top lid of the box, using a glue stick to glue the ends of the strips where they overlap (you can also use a small piece of clear tape to hold the bellyband in place). If you are applying a mailing label, apply your label to the top of the box and over the bellyband, covering up the seam where the bellyband ends meet. Press firmly to secure the label to the bellyband and the top of the box.
Mailing labels
- 8.5” x 11” label stock sheets (you can get this from almost any office supply store)
- X-Acto knife
- Pencil
- Large cutting mat
- Ruler
- Rounded corner punch
We created 5.3” x 2.625” labels to use on our bellybands and boxes, but you can create your own custom mailing labels by using 8.5”x11” label stock and trimming the labels down to your desired size. To make your own oversized labels, find some 8.5” x 11” full sheet label stock that you can run through your printer, or stock that your desired printer can print on. Determine the size you would like the labels to be, create your design (with crop marks) and then print your design onto the labels (if applicable, include name and/or mailing address if you do not want to handwrite it). Once printed, trim the labels along the crop marks using a ruler, an exacto knife and a cutting mat. You can leave the label edges square or use a rounded corner punch to round each of the corners of the label. After you are finished trimming, peel off the label backs and apply the labels to the top of the bellyband and box.
Resources
Letterpress printer:
Stacey Stern at Steracle Press in Chicago, IL or stacey[AT]steracle[DOT]com
Smyth sewn book binder:
Greden, located in (suburbs?) Chicago IL
Heat-activated adhesive sheets to fuse book fabric and paper together:
Fusion 4000 (40.5″ x 30 yard roll) from Talas
Book Fabric:
Rainbow Ecological Fibers – http://www.ecofibers.com
We used Rainbow Brillianta 4250 Lime, which came in a 52.5” yard roll
Archival paper for book pages:
8.5” x 11” sheets of pearl white Crane’s wove unwatermarked paper, ordered through Lewis Paper
Paper for belly bands and interior of book jackets:
26” x 20” sheets of solid paper from Paper Source
Boxes:
7” x 5.5” x 1” kraft jewelry boxes from Uline
Peat Moss for padding the boxes:
Can be purchased through a florist (it usually comes by the box)
Labels:
8.5” x 11” full sheet label stock (you can get this from almost any office supply store)
Rounded corner punch (you can get this from almost any fabric/craft store)
Cloth drawstring bags:
5” x 7” cloth bags from PackCo

Anna Barwick
Monday 11th of October 2010
I'm totally blown away by the levels of personality and love for your friends that these beautiful books convey. Imagine receiving one and knowing that you counted enough to be part of this. I'm just looking for inspiration on the net for my brides who will be here to plan with us this weekend and I'll certainly use these as a brilliant example of what a wedding is about. Love, history, sharing, effort. Wow!
Kathy Beymer
Tuesday 12th of October 2010
Thanks so much, Anna, for your kind comments! Have a great planning weekend!
Cyle
Monday 29th of June 2009
Super amazing design. All your work definitely paid off. I am a new wedding business based in Australia and I would like to use this idea, if that's ok with you. Thanks so much for this very detailed illustration. Very well done!
Jeff Carlson
Tuesday 24th of February 2009
Thanks for the shout out you guys . . . the (illustration) pleasure was all mine.
Tina
Saturday 24th of January 2009
OMG. These actually made my heart stop. Hands down, the best wedding invitation that I've ever seen.
Kathy Beymer
Monday 26th of January 2009
Yeah, I felt like that too. Nikki and crew are super talented, yes?
Merriment :: Kathy Beymer
Saturday 13th of December 2008
Hi Nick, great catch. I've edited the post above to credit Jeff with his super cute illustrations. Did I mention that the invitation is stunning??