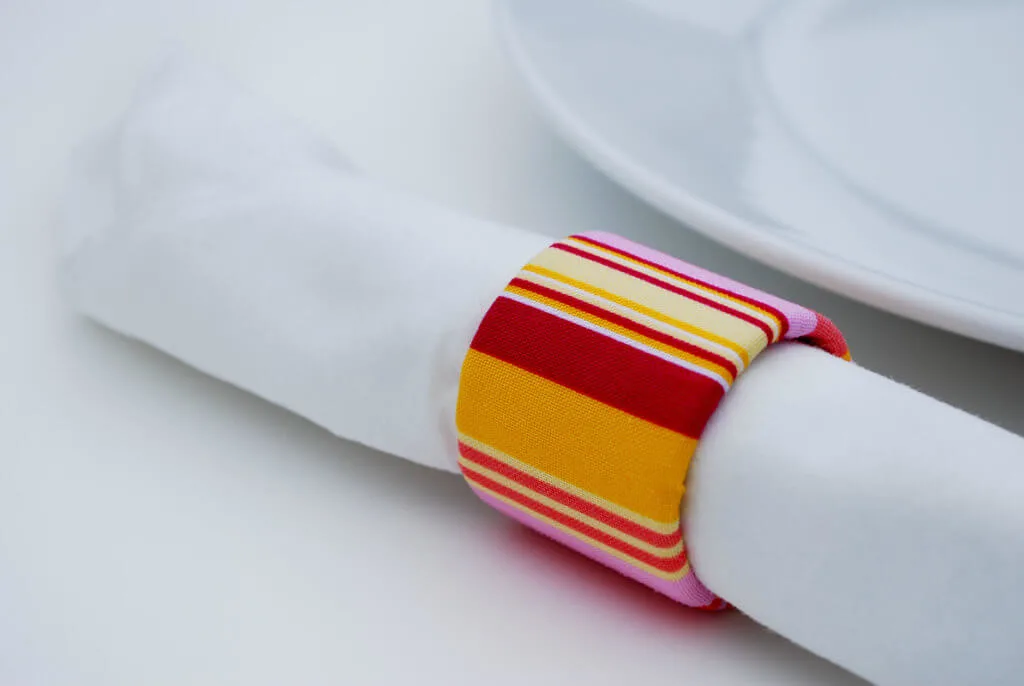
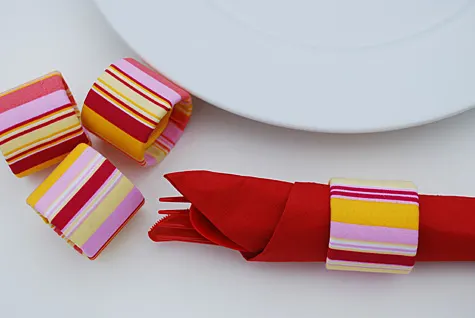
I made this fabric napkin rings recycled craft from an empty Saran Wrap tube. A few months ago I was getting ready to throw away an empty Saran Wrap box and happened to notice how the cardboard tube inside was oh so strong and sturdy. What useful thing could I make with such a pretty?? It’s round. Not easily crushed. Ah! I could cut it, cover it in fabric, and make napkin rings!
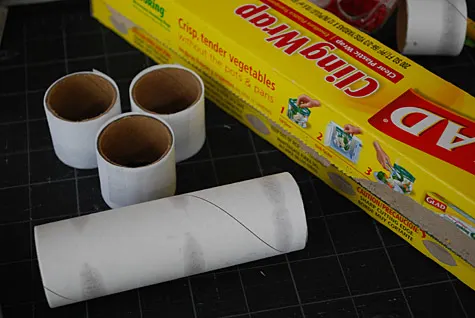
And that is how a cardboard tube ended up in my craft closet for three months. So this rainy-sunny-rainy weekend I sat down, fiddled a bit, and here we go! Cheery fabric napkin rings just in time to brighten up your summertime picnics.
—
Supplies for making my fabric napkin rings recycled craft (for 8 rings) (with links from affiliates):
- Empty Saran Wrap Tube
- 1/4 yard of fabric (you’ll use less but this is the minimum at most places)
- 1/4 yard of no-sew interfacing (again, you’ll use less than this)
- Grosgrain ribbon
- X-Acto knife
- Pinking shears
- Fabric glue
(or Double stick tape
)
- Self-healing mat
, rotary cutter
and clear plastic ruler
or good fabric scissors
(Buy a cutter and mat! You’ll use it all the time. Mine is well-loved, as you’ll see in the photos below
—
How to make fabric-covered napkin rings from a recycled cardboard Saran Wrap tube
One typical cardboard tube of Saran Wrap will make 8 napkin rings that are 1-1/2″ inches wide and 1-3/8″ diameter. Or you can make wider rings if you only need 6. These rings are best for premium square paper napkins and plastic silverware, but you can squeeze fabric napkins inside with no silverware if you roll them very tightly.
How to make recycled napkin rings – First cut napkin rings from Saran Wrap cardboard tube.
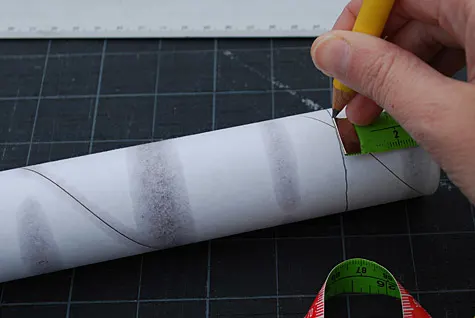
Using your measuring tape, measure 1-3/8″ and mark with a pencil around the circumference of the cardboard tube.
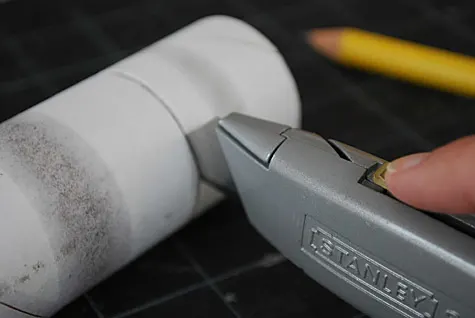
Carefully cut your pencil lines using an Xacto knife. Repeat for up to 8 rings.
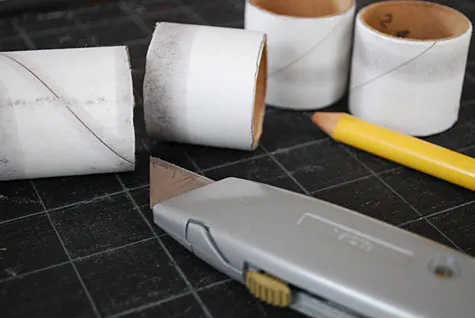
Hide cardboard tube markings (optional). I did this step because the striped fabric I used was sort of thin and I wanted to be sure to totally cover up the dark spots of adhesive remnants on the tubes.
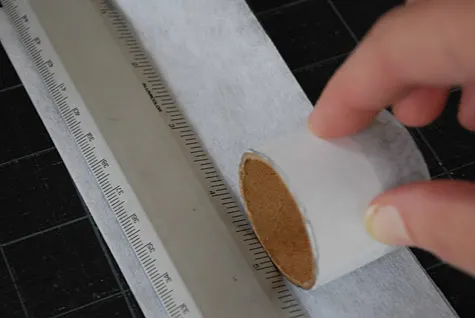
Cut 8 strips of no-sew interfacing 1-3/8″ wide x 5-3/4″ tall.
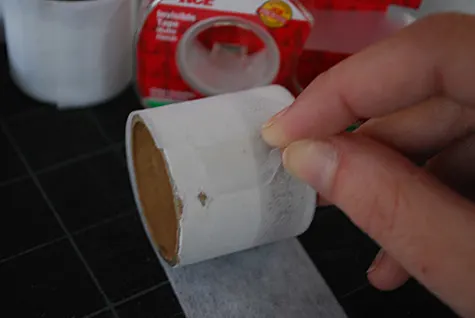
Tape one end of the interfacing to the ring (or use your adhesive). Roll the interfacing around the ring and secure with a second piece of tape.
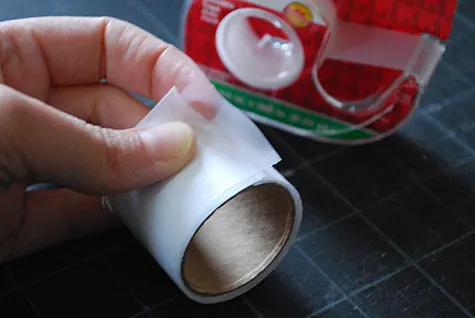
Wrap napkin ring with fabric.
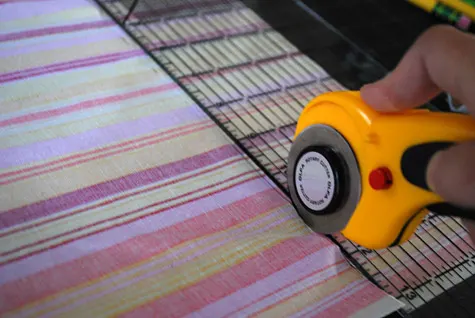
Cut your fabric in 3-1/2″ wide by 5-3/4″ tall strip (my fabric is shown face down in the photo but it doesn’t matter).
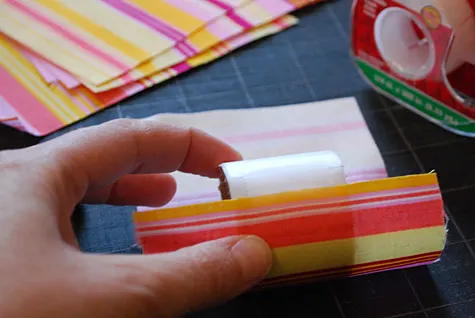
Place the napkin ring in the center of the fabric. Secure one end with invisible tape (or glue it if you’d rather), making sure the tape covers only a tiny edge of the fabric or else you’ll see it in your final product.
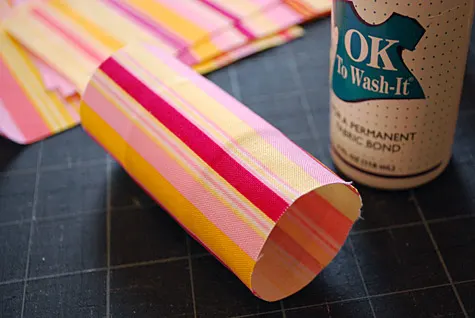
Roll the fabric tightly around the ring and secure using a dab of fabric glue, being sure to put some on the raw edge to prevent fraying (alternatively, you could turn a bit of the fabric under to hide raw edges or use pinking shears to make a zigzag edge).
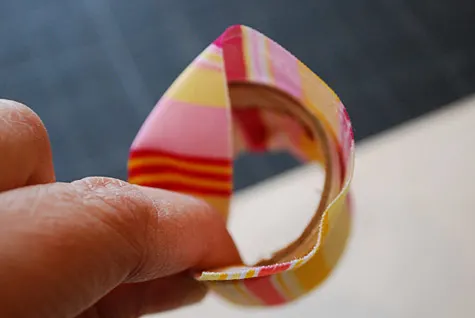
Put a bit of glue on one fabric end, fold inside the ring and glue to the inside of the cardboard ring. Repeat on the other side. Raw edges will meet in the middle of the inside.
Hide raw edges using ribbon.
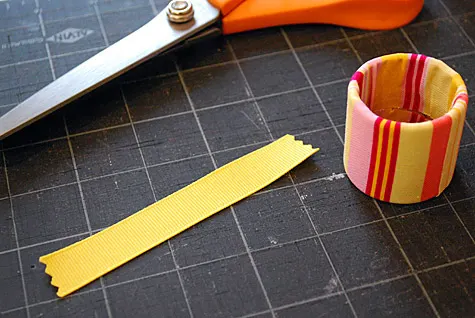
Using your pinking shears, cut one 4-1/2″ piece of ribbon for each napkin ring.
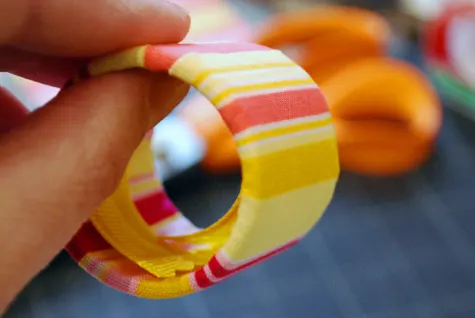
Spread fabric glue on one side of the ribbon. Curl it up a bit, slip it inside the ring and glue the ribbon on top of the raw fabric edges to cover them up.
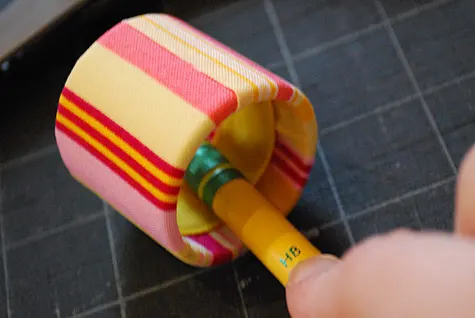
You can also use the end of your pencil to roll the ribbon flat inside. Let your napkin rings dry for at least 24 hours before using.
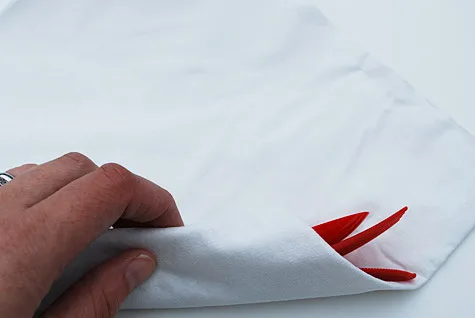
Wrap plastic utensils in a premium paper napkin (folded into quarters) and slip on the ring to secure. Fire up the grill!
—
Like it? Share it!
The nicest way to say you like it is to pin it on pinterest, post a comment, follow Merriment Design on Facebook, twitter, pinterest, Google+, instagram or sign up for monthly emails. Enjoy! 🙂
Copyright stuff: You’re more than welcome to use this free project and tutorial for personal use. Contact me for commercial use and etsy sales.

distro cref
Monday 19th of January 2015
Nice info this very awesome......
Nancy M.
Friday 16th of January 2015
Thank you for this. My students will make these out of donated fabric. My goal for 2015 is upcycled crafts only!
Johnd493
Saturday 10th of May 2014
Thanks for the article, is there any way I can receive an email whenever you publish a new update? dcdceeegcgfd
Juliana
Wednesday 22nd of January 2014
These are just awesome and I can create many because I do have some scrap clothes and tissue for creating beautiful pieces.
Barbara @ DIY Home Staging Tips
Monday 12th of November 2012
Kathy -- I loved these napkin rings and the tutorial so much that I posted a photo and link to your site on my blog today. I did a roundup of diy napkin rings suitable for home staging.
http://diyhomestagingtips.blogspot.com/2012/11/staging-dining-room-table-diy-napkin.html
I hope some of my readers will become new followers for you. Your blog is lovely!
Thanks and best wishes.